Showing posts with label Geometry. Show all posts

Wednesday, February 10, 2016

Race Around the World: an Angles Game (Protractor Practice)


Of all the areas of math, our 10-year-old isn't especially fond of geometry. To give him a little extra protractor practice, I thought up this angles game.


Anytime he has the chance to beat me, his attitude is "bring it" so I knew this would pique his interest.

What You Need to Play
PDF of the Earth game board and angles cards
Paper
Protractor
plastic sheet protectors (optional)
Pencil (or if using sheet protectors, fine-tip dry-erase markers)

Assembly
Download the PDF free from Google Drive here. Print one Earth for each player (or team if you're doing this as a classroom activity). Print two or more copies of the angles cards. Cut out and shuffle.

If you anticipate playing over and over, slide the Earth pictures into a plastic sheet protector. This make your game boards dry-erase.

How to Play
With the cards shuffled and placed faced down, each player takes a card on their turn and then lining up the protractor with the start line, draws in the angle stated on the card. On their next turn, the reference line becomes the line just drawn, instead of the start. The first player to get all around the world (i.e. past the start line) is declared the winner of the race!


Read
This math activity got us thinking about what life was like in different places across the globe. To further our understanding of cultures and time zones, we read a wonderful book that lead us on a journey that only took a single moment in time.


Wednesday, November 4, 2015

Free Printable Line Geometry Board Game

My 10-year-old son is a good at math. Probably better than his mom is. Geometry, however, has proven to be the one type of math that can give him a bit of a challenge.


I worked up a fun game to work on line geometry. It's similar to Candyland or Chutes & Ladders, but with a twist.

Assembly
Download a free 9-page PDF from Google Drive here. Print on heavyweight cardstock. Assemble the game board, trimming off any white excess on the paper's edge so it lines up properly. Trim the excess from the bottom of the game board as well.


Fold the pages with the arrow cards, open and add glue with a glue stick, press together and cut out. These cards will now be front-and-back. 

Cut out the spinner. Double over the paper so there are two plies of cardstock glued together and cut out the spinner's arrow. Use a tiny hole punch or craft knife to carefully cut holes in the spinner and arrow. Assemble with a brad.

Play
Grab small items to use as game pieces, one for each player. Place game pieces on the start. 

Place the arrow cards on the game board. The top of each card is either marked TOP, or is the darkest part of the ombre coloring.


Player 1 flicks the spinner and moves to the first occurrence of the line segment that the arrow is pointing to. 

If the back end of an arrow is at this space, the player may move their game piece to wherever the arrow is pointing. After this, their turn is over.

Player 2 takes a turn, and flicks the spinner. If the spinner lands on "TURN OVER ALL ARROW CARDS," then the arrow cards are flipped over horizontally (to keep the top of the cards at the top of each box). Player 2's turn is over.


Play continues in this way until a player spins the final type of line on the board first to win.

Flipping the arrow cards makes the game very spontaneous and can move players from the end of the board way back, almost to the beginning.


This game was loads of fun for my son and I and a great way to reinforce his line geometry vocabulary. Enjoy!

Wednesday, April 8, 2015

Rotation Reflection Translation Game {free printable}


My son brought his Geometric Patterns homework home last week and unlike most of his math homework, it took him more than 5 minutes. I even heard him mutter, "This is kinda hard," under his breath. 

I took a good look. I had the same thought I usually have when I look at worksheets: This would be a lot more fun if learning felt like playing a game.

And so an idea was born.


This game practices identifying three types of transformational geometry.

  • Rotation (when a shape is turned)
  • Reflection (when a shape is flipped backwards, showing its mirror image)
  • Translation (when a shape is simply moved)

The game is simple. Print one or two sets of the cards I made, along with the game boards. Cut apart. You can download the free 5-page PDF I made from Google Drive here.


Each player gets their own game board. Shuffle the cards and place them in a pile between players face down. Each player should place a game piece (we used those flat glass baubles) on the START circle. 


Player 1 will draw the top card on the deck and if the card they draw illustrates geometric transformation (rotation, translation, or reflection) that is noted in the circle next to the start, they'll place another game piece on that circle. If it does not, no game piece is played. Player 2 draws the next card.

The player to have game pieces on every circle on their game board first wins.

Wednesday, August 20, 2014

Paper Plate Ball


Both my boys had birthday parties in the last two weeks. With parents and siblings invited to both, we bought a surplus of cake plates so we wouldn't be short. Well, of course, we had extras. Lots of them.

We could either buy more cake or make an awesome polyhedron. I chose the latter. It's less calories.


My oldest son looked at me like I was crazy when I gave him a stack of paper party plates and a stapler and said, "Let's make a ball!"

The paper plate polyhedron requires 20 disposable paper plates. The smaller your plates, the smaller the ball. We used dessert plates and our ball ended up to be about 1 1/2 feet diameter.

Here's how we did it.

First do your best to flatten 20 disposable paper plates. You will need five for the top, five for the bottom, and 10 for the middle.

All the plates need to be folded the same. Make three folds in each plate, folding in the sides so the middle of the plate is an equilateral triangle.


I made my son a template to help him fold.

Begin stapling the flaps of five plates together, until they form the following shape. (We used two staples on each flap.) This is the ball's top.


Repeat to make the ball's bottom with five more plates.

Now to make the middle. Staple the flaps of the plates together so that the points of the triangles alternate up and down so you have a strip of 10 plates.


Bring the ends of the strip together and staple so it's shaped like a donut.


Set the top on your paper plate donut and line up the plate flaps. Staple in place.

Flip over and add the bottom, lining up the flaps, and stapling. Voila! You're done!


At the precise moment we finished, a neighbor boy came over. He was equally as impressed as my sons and I.


Want to up the challenge? Show kids a finished example and ask them to replicate it without instructions. Or simply see what they can come up with using the folded plates. I love the sculptural effect! One part art, one part engineering … now that's what I call some great after school learning!


Want to make a different polyhedron? Want a harder project? Check out this one made entirely out of cut paper!

Friday, June 6, 2014

Triangles to Squares Take-a-Long Game


Have you ever played dots and boxes? It's an astounding simple game that is perfect for passing the time. This little game fits that description as well. Critical thinking gets snuck in while kids play.


What You Need
PDF of triangles/squares (download it here)
Cardstock (2-5 sheets)
Small drawstring bag or plastic sandwich bag for transport/storage
Notepad and pencil for scorekeeping


Simply print the PDF on cardstock, cut out and get ready to play. If you want to increase the durability of the game, either laminate the pages before cutting out the squares or use foamies glue and adhere the paper to thin sheets of foam and use a straight edge and craft knife to cut out once dry.

To make the game car-friendly, buy a metal clipboard to use for storage and playing surface, shrink and print the pieces on sticker paper, and adhere them to thin magnetic sheets.

There are five pages in the PDF I made. For a short two-person game, only two pages of game pieces are necessary. Play is extended with more pieces. Likewise, for more players, you need more pieces.

The Objective
When all the pieces have been played, be the player with the most points. Points (or tally marks) are earned by adding the last piece to make a full square of any single color.


How to Play
All the game pieces should be turned face down in a pile accessible to the players. Each player draws three pieces from the pile and looks at them. (It's up to you if you want players to keep them secret or lay them out on the table in front of them.)

The youngest player picks one game piece and puts it in the center. He/she then draws from the pile of unused game pieces.

The next player looks at their three pieces and if possible, adds to the piece previously played. Play continues in this way, so that each piece must touch another of like color. The player to add the last piece to make a full square of any single color gets a point. Keep track with tally marks on a notepad.


If a player adds a game piece that finishes two squares, two points are awarded (see the picture above).

When all the pieces have been played, look at the scorecard. The player with the most tally marks wins!

VARIATION: During a child's turn, they can move an existing piece that's already been played on their turn instead of laying down a new piece.

EXTENSION: Talk about fractions as you play, asking the child to recite how much of a square is complete when a game piece is added (e.g. "Now there is 3/4 of a red square!").


When the game is over, put the pieces in small bag for easy transport. (I plan to tote this around in my purse to play next time we're waiting for food at a restaurant.)

Wednesday, May 21, 2014

Balls and Shapes Bullseye Game


Finding a game for multi-agers can be difficult. This game is extremely simple and can be customized to challenge kids at varying levels.


All you need is a piece of paper and pencil for scoring, painters tape, and a few small balls.

Set up
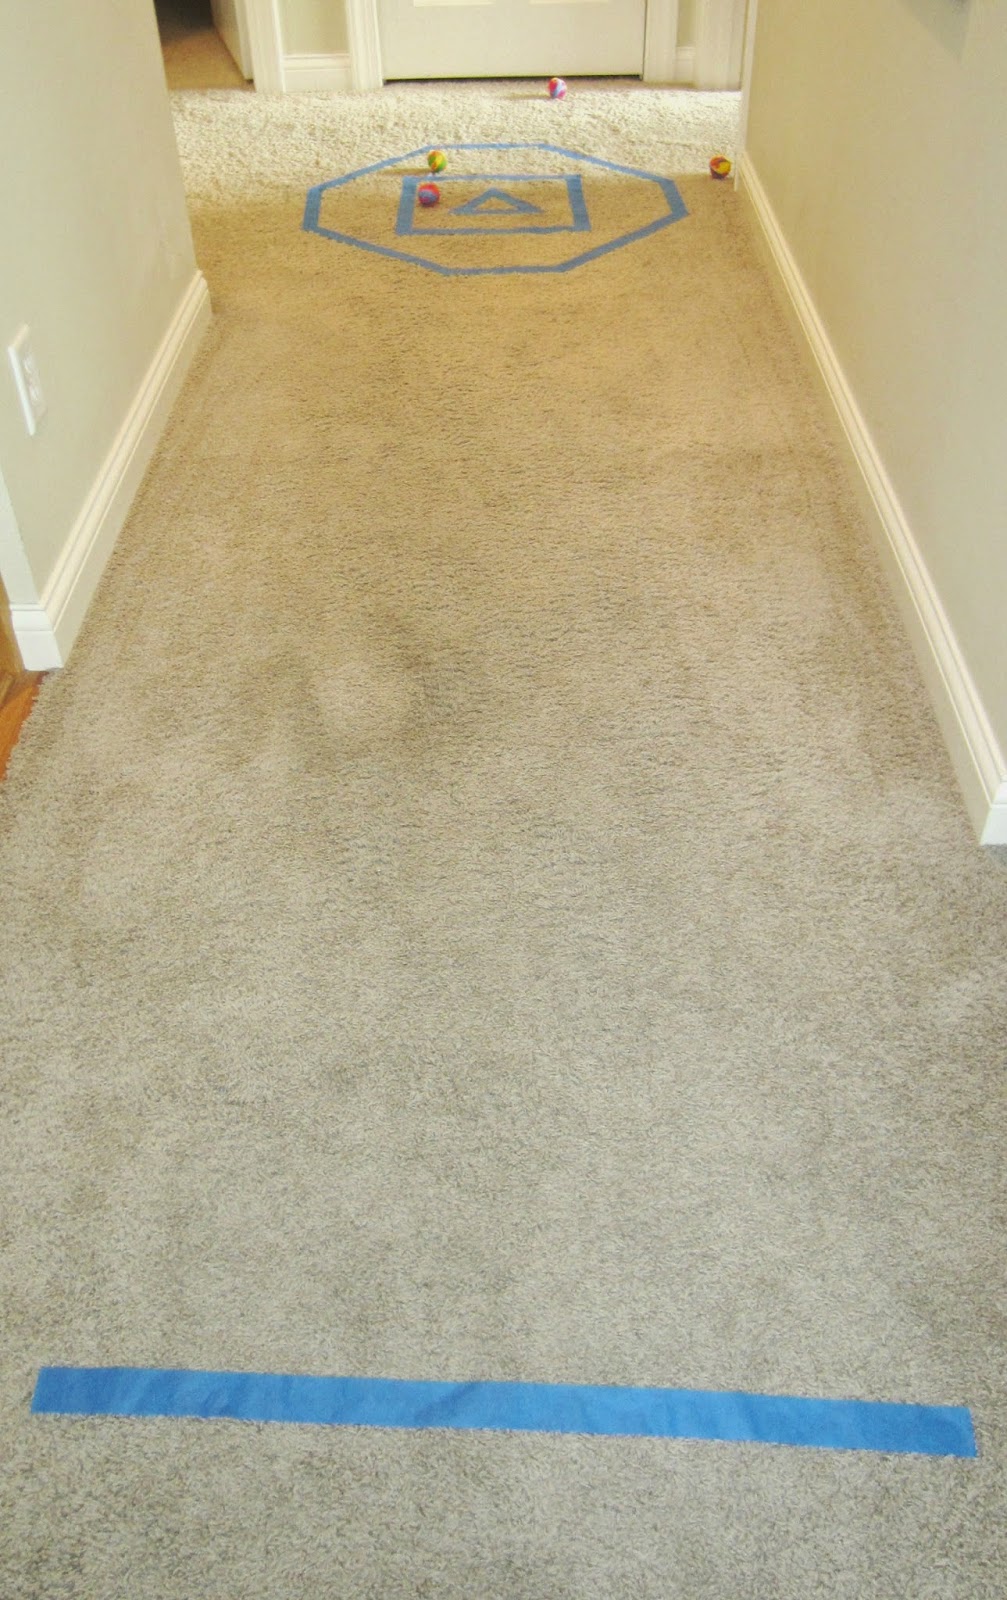
Using the painters tape, make three different shapes, one inside the other, on the floor. Ours were a triangle inside a rectangle, inside an octagon. Add a strip of tape for a starting line about five or six feet back.


Now grab your kids and some balls.

How We Played
I tore off a piece of paper from a notepad and wrote down the points for each shape.


My two sons took turns tossing three balls at the shapes bullseye. When it landed in a shape, they'd proclaim, "You got an octagon!" or "It landed in the triangle." This was great reinforcement of the shapes for my four year old!

My oldest son kept score (i.e. got some math practice in).


They played five rounds and then the score was totaled. The player with the most points wins.
Smart. Simple. Cheap. Fun. All you need are balls and a shapes bullseye made of tape!


This activity was inspired by What to Expect.

Wednesday, February 26, 2014

Paper Polyhedron


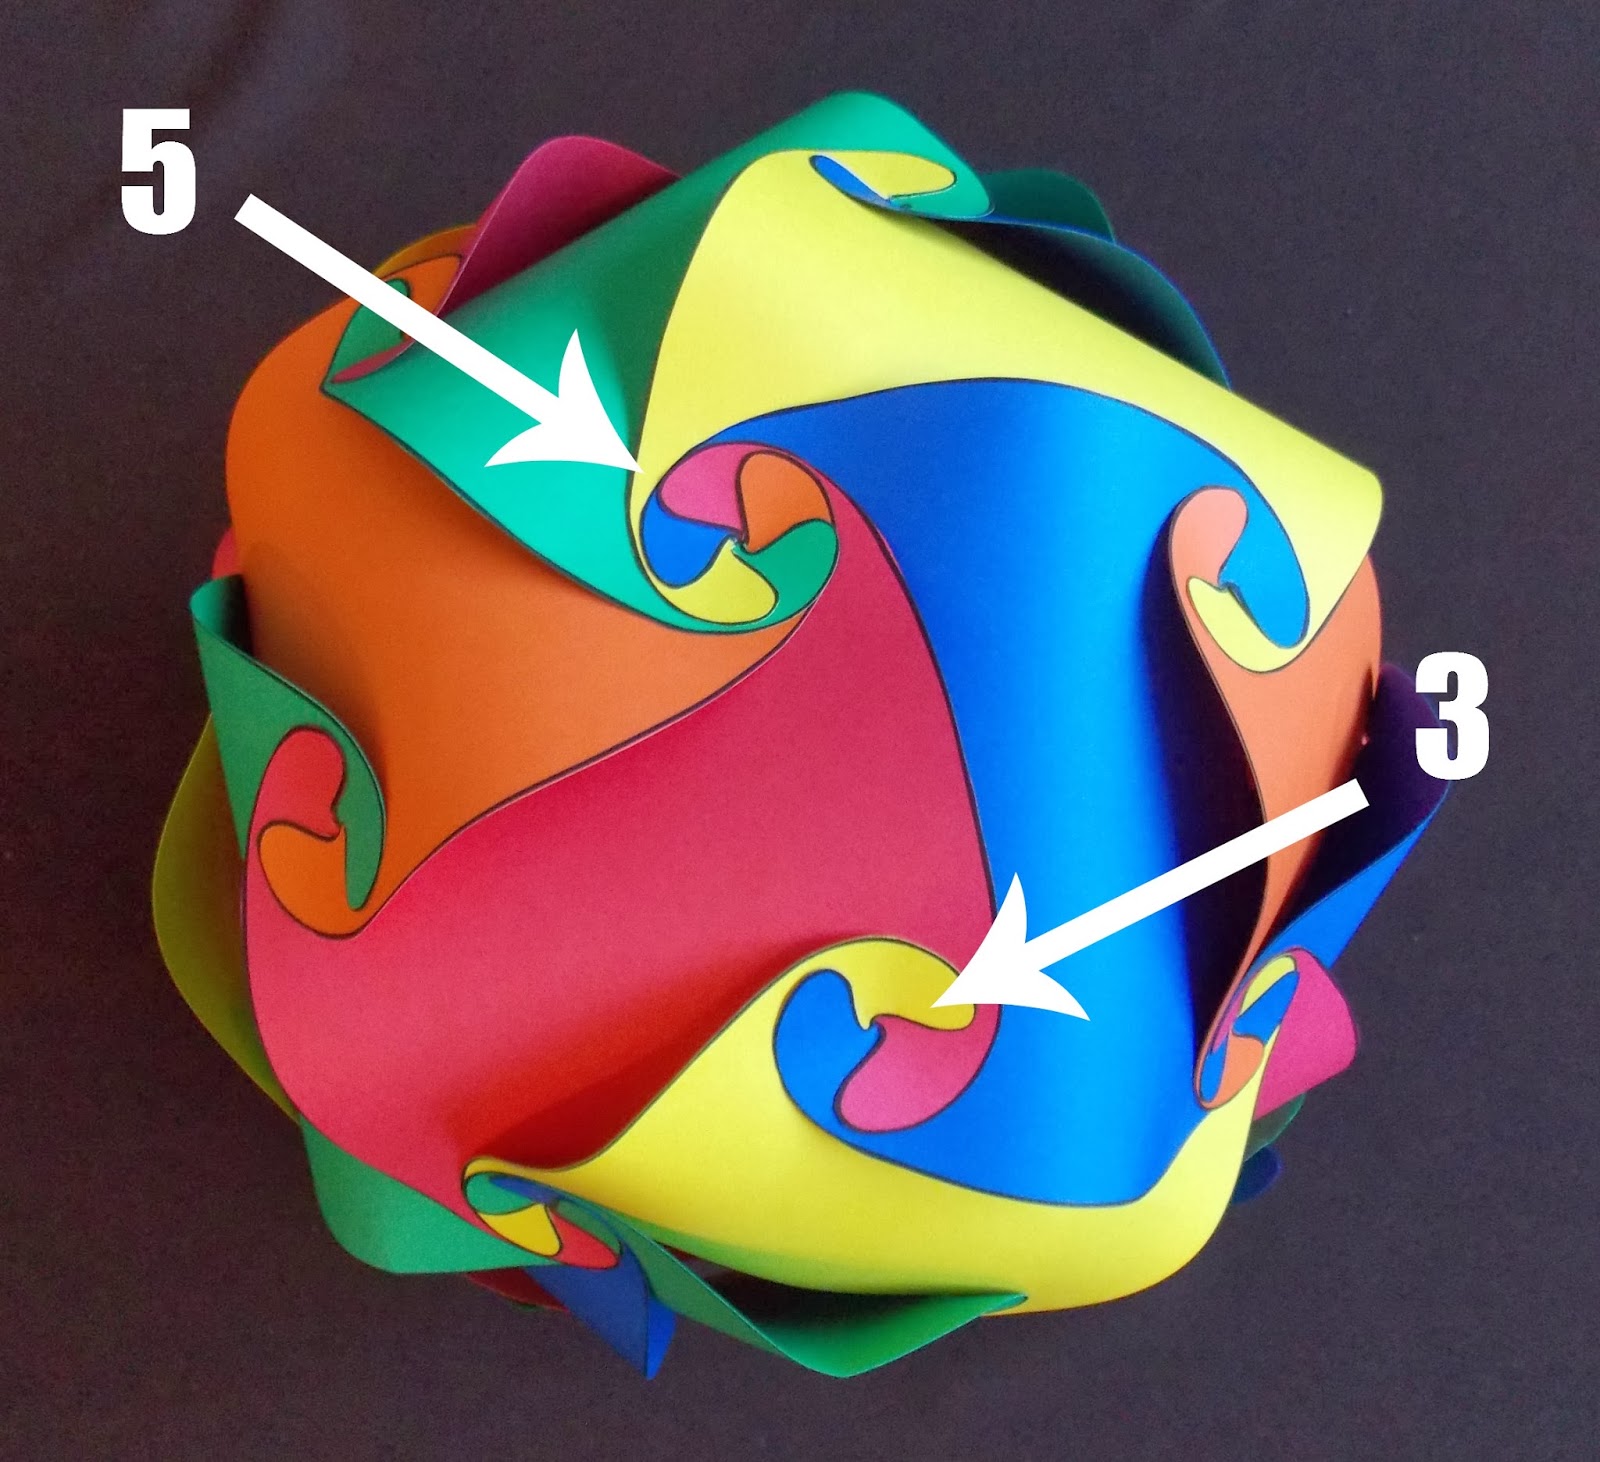
This is the coolest paper craft we've ever done. Cut paper and add a little patience and a lot of determination and you've made yourself a paper polyhedron ball.

Here's what you need for this project:
10 pieces of cardstock paper
Template to print on cardstock
Scissors

If your child's cutting skills lack precision, you may need to cut the pieces from the template for them (they'll need 30 pieces). My son is eight years old and not only struggles to cut along the lines, but lacks the patience to cut 30 pieces.

So I admit, I did all the cutting.

And it took awhile.

Before my son got home from school, I played with the pieces. I'm not going to lie. It took me a little while of fiddling and a few moments of intense staring at the pieces to figure out how to assemble them.


Here are some tips to (hopefully) make this project easier for you and your child.
  1. Start by making a star, hooking five different pieces together around one hook/joint (see the top right photo in the collage below).
  2. Every joint will connect either three or five pieces.
  3. When you add new pieces, you will have to tuck the new piece under existing hooks when you attach it.
  4. The pieces are NOT flat. Each piece (when attached) billows out in the middle.
  5. If it doesn't seem like there's a logical way to connect pieces together, look at the joint. Whenever we got stumped, we realized there were four pieces connected at the joint and another piece needed to be attached there.
  6. The last two pieces will be awkward to attach because space is limited. You may have to bend the paper slightly.


Remember, that this is a collaborative project for you and your child. Two minds are better than one. And the project will be more fun - and less frustrating - when you work together.

My oldest son was intrigued but nervous. The more he attached, the more his confidence grew. And when we were done, he was ecstatic!


I don't blame him. The result was sure impressive!

Wednesday, February 12, 2014

Math Mission: Find the Secret of the Circle


Want a great activity that uses materials around your home? One that teaches math vocabulary? Introduces advanced math concepts simply? And is hands-on?

If you answered yes to any of those questions, this activity is a great one for your child. My third-grade son loved it!

What you need:
A ruler and/or a tape measure
pencil
paper
calculator
string
scissors
Circular objects (we used four)

This activity teaches:
  • The difference between circumference (measurement AROUND the circle) and diameter (measurement THROUGH the exact center of the circle) .
  • That the circumference of a circle is always in the same ratio to its diameter.
  • How no matter the size of the circle, the diameter is always approximately 3 times smaller than the circumference.
  • Math vocabulary (e.g. ratio, diameter, circumference).

Skills used: measuring, translating fractions into decimals, deductive reasoning, and division.


Before my son got home from school, I raided the kitchen cabinets and grabbed a glass, bowl small plastic food storage container, and a saucer. All of these objects were round and their shape could easily be traced onto paper.

After he dropped his backpack at the door and was sufficiently nourished with a tall glass  of milk and a homemade cookie, he got to work. One by one, he traced the shapes on blank pieces of paper. NOTE: all the objects I chose were small enough to trace onto standard office paper.

Next, he measured the diameter of each circle. To find the exact center, we folded the paper (making sure the edges of the circle lined up). Then he used yarn (I'd recommended a string that doesn't stretch; our yarn may have skewed some of the results slightly) to wrap around the base of each object. The yarn was the same size as the circles he'd drawn. Once it was measured, the circumference of each object recorded.

Now came the fun part, he divided the circumference by the diameter for each circle using a calculator. (This required figuring out what the decimal for 3/8, 5/8, 3/4, and 7/8 were.)


All of our answers were 3, plus a little. My son was able to deduce that no matter what the size of the circle, the ratio of the diameter to the circumference was basically the same. And THAT'S the secret of the circle!

If your measurements are precise enough, the number will  be PI (3.141592635). Even with our stretchy yarn, we ended up with 3.0163, 3.2, 3.11, and 3.1304. Not bad, I'd say!

This great activity came from Math Wizardry for Kids by Margaret Kenda and Phyllis S. Williams.

Friday, October 4, 2013

Cover it Up {5-in-a-Row Geometry Game}


This clever game is inspired by travel BINGO. I played it as a kid and absolutely loved it. Since my oldest son shares my love of games, I figured he'd feel the same.

I was right.

Supplies
Sticker paper (or office paper and a glue stick)
Plastic 8 1/2 x 11-inch sheet protector
Empty cereal box
Office paper
Cardstock
Stapler
Craft knife
Scissors
Straight Edge (i.e. ruler)
Die and game card templates (click here to download them free)

How I made the game
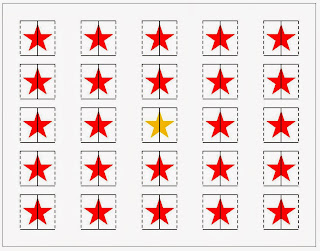
Print the game card onto sticker paper. Adhere to one of the large sides of an empty cereal box. Cut the card out, trimming off the excess paper and cardboard. Using a craft knife and a straight edge, carefully cut along the lines, so the flaps to each starred square can be opened like french doors. I put a cutting board underneath to prevent scratching my countertops or table.


To make bending the flaps open easier, score the folds by using a straight edge to guide the back end of a butter knife along the dotted lines. Gentle pressure will form an indent that will make your creases look straight.

With all the flaps cut, grab your plastic sheet protector. Place the game card in one corner, so two of its sides align with the folded or seamed sides. Once aligned, use the card as a guide and drag your craft knife along two sides of the card to make the sheet protector smaller.

Now one of the long ends of the sheet protector has been cut open. Use a stapler to adhere the sheet protector envelope and the game card, effectively closing that open side. Staple along the bottom of the card as well to hold the sheet protector in place.


Make sure one side of the sheet protector remains open.

Now cut the shape card inserts. Depending on how far away from the top and bottom edges of your card that you stapled, you'll need to trim the shapes card inserts so they can be slid into the plastic sheet protector and lined up properly.


Lastly, print, cut, glue and fold the dice. It works best to print the die templates onto heavyweight cardstock. Once glued, use a rubberband to loosely hold the sides together until glue has dried.


There are two levels of play; the most basic shapes have a grey background both on the shape card insert and the die.

Two die should be rolled with every turn: the color die and the shapes die (make sure you're using the correct shapes die with the shape card insert you're playing on).


How to Play
The player rolls the shapes and colors die, locates the square on their game card that pictures the shape being described by the die, and closes the flaps to cover it up.

Once you've gotten five squares in a row (horizontal, vertical, or diagonal), you're done!


Both of my boys had a blast with this and I was especially surprised at how long our 4-year-old played before growing tired of it. This was a wonderful geometry review for my oldest son and a simple shapes and color review for our youngest boy!

NOTE: The PDF I've created includes a blank template so you can use the Cover it Up game board to practice any number of skills - letter recognition, division problems, Spanish vocabulary, etc. By using the plastic sheet protector sleeve, you can easily swap out the cards for different skills.

Wednesday, September 25, 2013

Easy DIY Geoboard (and a Lesson in Polygons)


Polygons, quadrilaterals, and parallelograms, oh my!

Anybody else get it all confused?

To help my oldest son practice polygons, I grabbed a busted bulletin board my husband had tossed in the trash (not quite dumpster diving, but I wouldn't put it past me to do that either for the sake of my kiddo's education!).

The bulletin board was a thin layer of cork paper over corrugated cardboard. I cut it and glued two plies together, making two smaller, albeit thicker, bulletin boards.

Now I carefully glued pushpins in place in a grid pattern. Use the strongest glue you can find, like super glue or gorilla glue. I printed a grid and with a ballpoint pen, punched the location of the dots into the cork, then dabbed glue in the imprints I'd made, and inserted a pushpin.
Put a heavy book on top for pressure and let dry.


Now grab a handful of rubberbands, print the 1-page PDF of polygon cards, cut out, and go get your child.


Before my oldest son started made polygons, he watched a 10-minute video about what a polygon is (and isn't). This video was made by a classroom of kids and perhaps because of its child "actors," he was captivated.


When finished, he went through the eight shapes on the polygon cards and did his best to stretch the rubberbands around the pushpins to emulate the number of sides and angles pictured. Some shapes were easier than others!

When little brother wanted to give it a try, we stuck to simpler shapes - the triangle, square, and rectangle.


Both boys had fun and were excited to show off the shapes they made!


WORD OF WARNING: If the rubberbands are tugged on aggressively, the pins may come loose and pop out. Always play along and encourage kids to slowly and gently remove the rubberbands to prevent a potential safety hazard.

Wednesday, July 17, 2013

Types of Triangles Board Game


I'm not sure what I was dreaming about or why but when I woke up in the morning I had the idea to make a board game to help my son learn the four types of triangles:
Scalene
Right-angled
Equilateral
Isosceles

Too afraid to forget the idea, I got out of bed, sacrificing sleep for this new activity.

First, I made a cheat sheet to help my son learn the differences between the four types of triangles.


Then I made a template for a cut-and-fold die with the four types and two other commands. 

Lastly, I made the Travel Around the Triangle game board.


Download and print the free four-page PDF and make this game yourself. (Remember to print the die on cardstock so it's sturdy enough to be rolled around. And when putting the game board together, the bottoms of the pages will not be aligned; use the triangles as your guide for where to tape the two halves together.)

To help get us in the mood, we read Triangles Around Town, which helped us realize that triangles are practically everywhere!


To play the game, I grabbed two small pom poms to use as game pieces for my son and I. You can use anything small - buttons, magnets, two different coins, etc. 

Now, we got rolling. Simply roll the die and move the game piece to the triangle featured. If the top of the die reads "Roll 2 more times and move ahead twice," the player must roll until the die lands on a triangle, move to that triangle on the game board, roll again until another triangle is revealed and move once more. 

If a player rolls the "Roll again and move back to that triangle," the same is true. They must keep rolling until a triangle appears on the top of the die when it stops moving. If the player is at the start, the turn is over and their opponent rolls the die.


The first player to make it to the right-angled triangle at the finish wins!

Monday, April 15, 2013

Shapes, Letters, & Towers: Building with Marshmallows


You know what I love even more than when an activity goes exactly as planned? When my kids take the lesson even further than I'd dreamed. That sends this deceptively educational mom over the moon!

This simple engineering activity is a perfect example.

I got the idea from a local STEM event eons ago, that provided kids with mostly edible building supplies and asked them to build and evaluate which shapes created the strongest, most stable structure. On the table were gumdrops, marshmallows, toothpicks, and uncooked spaghetti noodles.

For our experiment, I omitted the gumdrops. Marshmallows would suffice as our "connectors."

I started by asking my oldest son to build a cube with toothpicks and marshmallows. What he soon discovered was that it was wobbly, wonky, leaning, and shaky (choose whichever adjective you like best).

To stabilize it, he added diagonal lengths of broken spaghetti noodles (essentially X shapes around all the sides). We checked the cube; no more wobbling! He was excited. Now the pace of building REALLY picked up.


While he was busy popping marshmallows in his mouth and building his four-story tower, little brother came wandering by.

"I want to do that," said my preschooler. "I want to make a triangle."

This was when the questions came spilling out of my mouth. "How many sides does a triangle have? How many toothpicks will we need?" In no time flat, he was exercising his fine motor skills to make a triangle.


"I want to make an E," he said next. This took a little more instruction from me but boy, oh boy, was he proud when we were done.


What started as an engineering activity for my oldest son became that AND a lesson in shape and letter recognition for my youngest son. That made the nominal amount I spent on supplies for this activity WELL worth it!