Showing posts with label Colors. Show all posts
Wednesday, February 24, 2016
Super Simple FREE Printable Sight Word Game
My son is on the last of the seven lists of sight words he needs to memorize before year end. He is beyond excited to master these last 20 words. In support of this mission, I devised a simple sight word review game to make practicing fun.
Not interested in the same 20 words as us? No problem. One of the three pages on the free PDF is a blank game board. Just print it out and write on your own words!
Download the free PDF from Google Drive here. REMINDER: If you are a teacher and need to request access to my printables through Google Drive, use your personal email address. In many cases, your school blocks emails coming from outside their domain, thereby prohibiting me from granting you access and notifying you via email.
What You Need
PDF of the Say that Sight Word game board and die
Heavyweight card stock to print the PDF on
Scissors and glue to cut, fold, and finish the die
A unique game piece for each player
How to Play
Each player's game piece should be placed on the words START. The youngest player begins their turn by rolling the color die. Whatever color they land on, they will move to the first occurrence of this color on the game board. They must also say the word there. If they don't get it right, help 'em out.
Play alternates between players. The first player to reach the green spot at the finish is the winner!
Wednesday, January 13, 2016
How to Make Paper Flowers Bloom (Art + Science)
There are no flowers blooming here in the Midwest in January, unless you're at the florist. A thick blanket of crusty snow covers everything and temperatures are so frigid, only the very brave can be outside for more than 10 minutes.
To bring a little spring into our winter, I thought we'd try this fun experiment. It combines art and science in a truly awe-inspiring experiment.
Prep
I created a template of paper flowers for us to use. (Download it free from Google Drive here.)
Create
Once printed on heavyweight card stock and cut out, we used permanent markers to decorate our flowers.
When our buds were beautiful and bright, we put down the markers and folded each of the petals in to the center of the flower, making a nice neat little square.
Experiment
With a shallow bowl of water nearby, we carefully dropped our squares into the water (folded petals face up). Now, behold!
Within about 30 seconds, each of the paper flowers will open to display the beautiful colors added inside!
How Does It Work
As the paper begins to absorb the water, its fibers expand, forcing the paper petals to unfold.
This great activity came from 175 Science Experiments to Amuse and Amaze Your Friends by Brenda Walpole. It's loaded with fun and fascinating hands-on learning ideas!
Wednesday, January 6, 2016
Top 15 of 2015: Deceptively Educational's Most Popular Activities
What a year it's been! I published 77 deceptively educational activities, games, and ideas in 2015. Here are the 15 most popular.
No. 1
Equivalent Fractions Missing Numerator Game
No. 2
No. 3
No. 4
No. 5
No. 6
No. 7
No. 8
No. 9
No. 10
No. 11
No. 12
No. 13
No. 14
No. 15
I can't wait to see what deceptively educational ideas and activities await us in 2016!
Thanks to all who continue to follow our journey!
Wednesday, July 1, 2015
Walking Water (a Science and Art Experiment)
With three tumblers on the table, a measuring cup filled with water, paper towels, and food dye, I told my sons we were going to fill a cup with water without pouring a single drop in it.
"HOW?!?" they said.
"Let me show you!"
This experiment is simple. It did require patience,
though. We prepared our cups in the afternoon and then watched throughout the
evening and overnight.
How We Did It
Fill two identical drinking cups 2/3rds full of water. Put an empty
cup of the same size between them. Squirt 8-10 drops of food coloring in the
water-filled cups. We used yellow in one and blue in the other.
Now take a paper towel - we used a half sheet since we
have the select-a-size rolls - and fold it the long way so the paper towel is
about an inch wide. Do the same to another paper towel so you have two long
flattened 1-inch wide rolls of paper towel. Fold them in the middle and put one
end in the food dye, and the other in the empty cup.
Now observe what happens.
What Happens
The paper towel absorbs the water and in doing so, the
colored water is transferred from one cup to another. When the two primary
colors, yellow and blue combine, they make green.
Even more fascinating is how the water level ends up
perfectly even among all three cups. The water has been evenly distributed! It took about 36 hours for our water to "walk" from each of the end cups to the middle and even distribute between the three cups. Have patience!
This great
experiment came from Coffee
Cups and Crayons. Stop there to see other color combinations!
Friday, June 12, 2015
Bugs on Parade {Printable Game to Practice Color Words}
Before the summer began, I jotted down a number of themes to explore while the boys were off school. Bugs was at the top of the list.
This fun little game helps kids begin to associate actual colors with the color words, and can either help familiarize kids or practice color sight words for those that are already learning phonics and have some early reading skills.
Bugs on Parade was a blast to make and just as much fun to play.
What You Need
PDF of the game board and die (download it here)
4 pieces of heavyweight cardstock, onto which you'll print the game board and die
Scissors, tape, and glue for assembly
Game pieces (we used different colored buttons for each player)
Prep
Pages 1-3 are the game board and because your home printer won't print full bleed (to the edge of the paper), you'll need to trim a little white strip so the board's space touch. Tape the three pages together. (For storage, fold the board in a z-shape.)
Cut apart the die. Score the lines with a butter knife and fold. Glue with a low-temp glue gun.
Note: The printable provides two die - beginner and advanced. For young children who are not reading, exploring phonics, etc. it's best to use the colorful die. No reading is required to play. Simply seeing the sight words over and over again will help reinforce learning. The other die does not contain colored sides; players must use their color words familiarity or phonics knowledge to read the die.
Play
All players must put their game pieces on the START lettering. They'll take turns rolling the die, reading the color word, and moving their game piece to the first occurring bug on the board of that color. If the player rolls "Lose a Turn" then play continues for the next player. If the player rolls "roll and move 2" they will roll the die and whatever color word is on top of the die, they must move TWO of those colored bugs forward on the board.
The player to reach the final yellow bug first wins!
Read
Want a perfect book to pair with this activity? Check out Jerry Pallotta's Icky Bug Colors book. Not only did it teach us about bugs, but it showed bugs in each color!
Wednesday, March 11, 2015
Black is black, right? Nope. (A Chromatography Experiment)
Because our color theory activity book was such a hit, I suspected a chromatography experiment would be as well. I was right.
My 9-year-old son and I both found this fascinating.
I can think of loads of other adjectives to use to describe it too ... cheap, simple, fast, impressive ... heck, it was almost magical.
Supplies
Clear Drinking Glass
Pencil
Coffee Filter
Tape
Black Watercolor Marker
Rubbing Alcohol
Prep
1. Flatten and cut the coffee filter into a wide strip that's a little more than an inch across. Trim the ends to make a rectangle.
2. Tape one end around the middle of a pencil. Put the coffee filter pencil into your glass, so the top of the pencil ends rest on the rim of the glass and the filter hangs down into the bottom. Trim the coffee filter so it just touches the bottom of the glass. Remove.
3. Fill the glass with a 1/4-inch (or approximately 1 centimeter) of rubbing alcohol.
4. Draw a dot in the middle of the coffee filter strip about 2 centimeters (or a 1/2-inch) from the bottom. Your dot needs to be higher than the amount of alcohol in your cup.
Experiment
Place the pencil back on top of the cup so the bottom of the coffee filter touches the alcohol in the glass.
Watch what happens as the coffee filter wicks up the moisture. How does it impact the dot?
My son's hypothesis was that the dot would totally disappear. When he saw the dot appearing to move up the paper, he thought he might be on to something.
The more we watched, the more the dot changed. The pigments in the watercolor ink began to separate. First, we saw green, then pink and purple and even some blue too. I reminded my son about how we make black paint from other colors of paint. "Oh yeah!" he exclaimed.
The rubbing alcohol initiated chromatography, which (in layman's terms) is the process of a liquid or gas changing a mixture into its components, in this case through absorption.
By the end of the night, our black ink had moved all the way up the coffee filter strip. What a cool experiment!
This wonderful activity came from Science Experiments for Kids.
Wednesday, February 11, 2015
What Color Will Win? (Spin & Graph Activity)
My youngest son is really working on phonics but listening
for beginning sounds still needs practice. This activity might not seem like a
phonics activity but, believe it or not, it is.
What You Need
Small toy spinning top (ours came from the Dollar Tree)
Jelly roll (or other baking pan with sides) or a flat,shallow
tub/box
2-page PDF of colors and graphing sheet
Paper
Marker or crayon
Prep
Download the PDF for free from Google Drive here. Print.
Place the page of colors in your box/pan.
Play
Have you child spin the top and watch to see where its
point lands on the color page. If your top doesn't move around much, try
spinning it from high above the pan.
Wherever the top lands, your child must color in a box at
the bottom of the graph. Here's where the phonics come in. When it lands, it's
up to them to figure out which column to color - they do this by listening to
the beginning sound and looking for the representative first letter in the
color words on the graph.
I purposely did not put the words on the color page and
make the words on the graph colored. In doing so, this activity is not just
about learning colors and some simple math skills, it's also an exercise in
phonics.
My 5-year-old had so much fun with this that his
9-year-old brother wanted to do it when he was done!
Friday, January 23, 2015
Color Theory for Kids {free printable color book}
I'm taking continuing education night classes in graphic
design. A few nights into the class, we spent three hours on color theory. It was
crazy cool and I had an inkling my boys might find it interesting too.
I made them a fun interactive book to complete. It
explains the color wheel, primary and secondary colors, complementary colors,
and tints and shades. We used our DIY marbleized paper as the cover!
Supplies
downloaded PDF of the book
heavyweight cardstock
crayons, colored pencils, or markers
pen/pencil
stapler
scissors
brad
unconventional paper punch
paint (red, yellow, blue, white, and black as well as any
additional
colors)
paintbrushes
Assembly
I've got two PDF files for you to choose from. The first
is for those of you who want to print double-sided. Download
the 6-page PDF here.
On the back of the PDF's page 1, print page 4.
On the back of the PDF's page 2, print page 5.
On the back of the PDF's page 3, print page 6.
For those of you who don't want to mess with figuring out
how to reinsert the paper properly in the printer, here's
another PDF for you to download. You can toss the cover page and just
staple the pages in the corner like a short stack of activity pages.
Print pages on heavyweight cardstock since some pages
require painting. Trim them along the dotted line. Use an unconventional paper
punch to punch a hole in the page with the color wheel spinner as well as the
arrow spinner. Cut out the spinner and attach to the color wheel with a brad.
To make the pages into a book, arrange the pages and fold
in the center. Carefully and loosely, trying
as best you can not to crease the pages too much, fold under the back half of
the book so it can fit in a stapler. Staple twice along the fold.
Now hand over the book and some art supplies and watch
your kids learn color theory!
Note: If you're doing the book in one sitting, I
recommend only using paint on the tints and shades pages, so that there's no
down time for drying. My boys mixed the paint colors on the equations pages and
then colored the answers in marker. I also used small clipboards to hold the pages open while they painted.
Wednesday, January 21, 2015
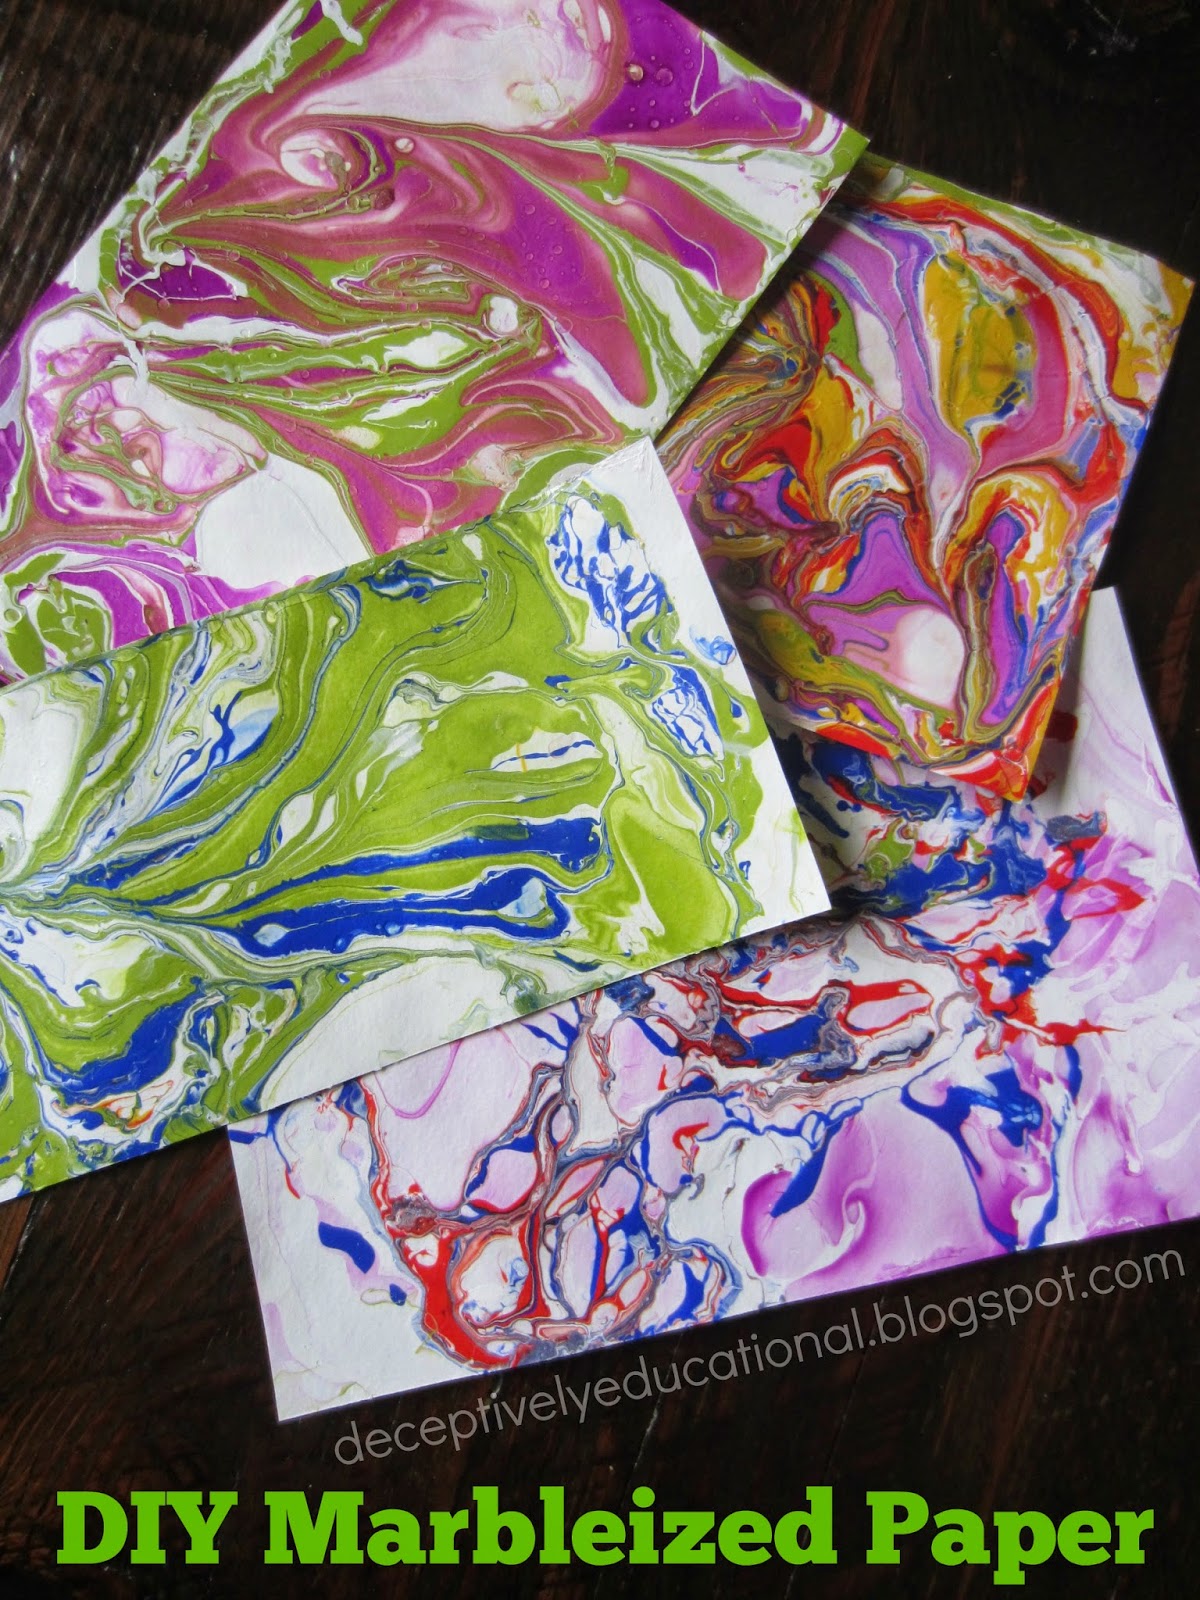
DIY Marbleized Paper
Our art projects have to have a serious wow factor. My
boys don't have the interest or the patience to work on a piece gradually over
several days. Mixed media that seems as much like magic as it does art is right
up their alley.
Marbleizing paper is so much fun and surprisingly easy,
too!
Before I provide a supplies list and instructions, I need
to issue a disclaimer. This project stinks (literally, not figuratively). You HAVE to work in a
well-ventilated area. What you can't see in my pictures are the two windows
that I threw wide open to dissipate the fumes. Nail polish smells B-A-D.
Supply List
Watercolor paper (or another paper of heavy weight)
Nail polish in as many colors as you'd like
A disposable pan that your paper will fit into
Water
Plastic to cover your work surface
Gloves
Well-ventilated space
Tool to swirl the colors with (we used the wooden ends of
paintbrushes)
Instructions
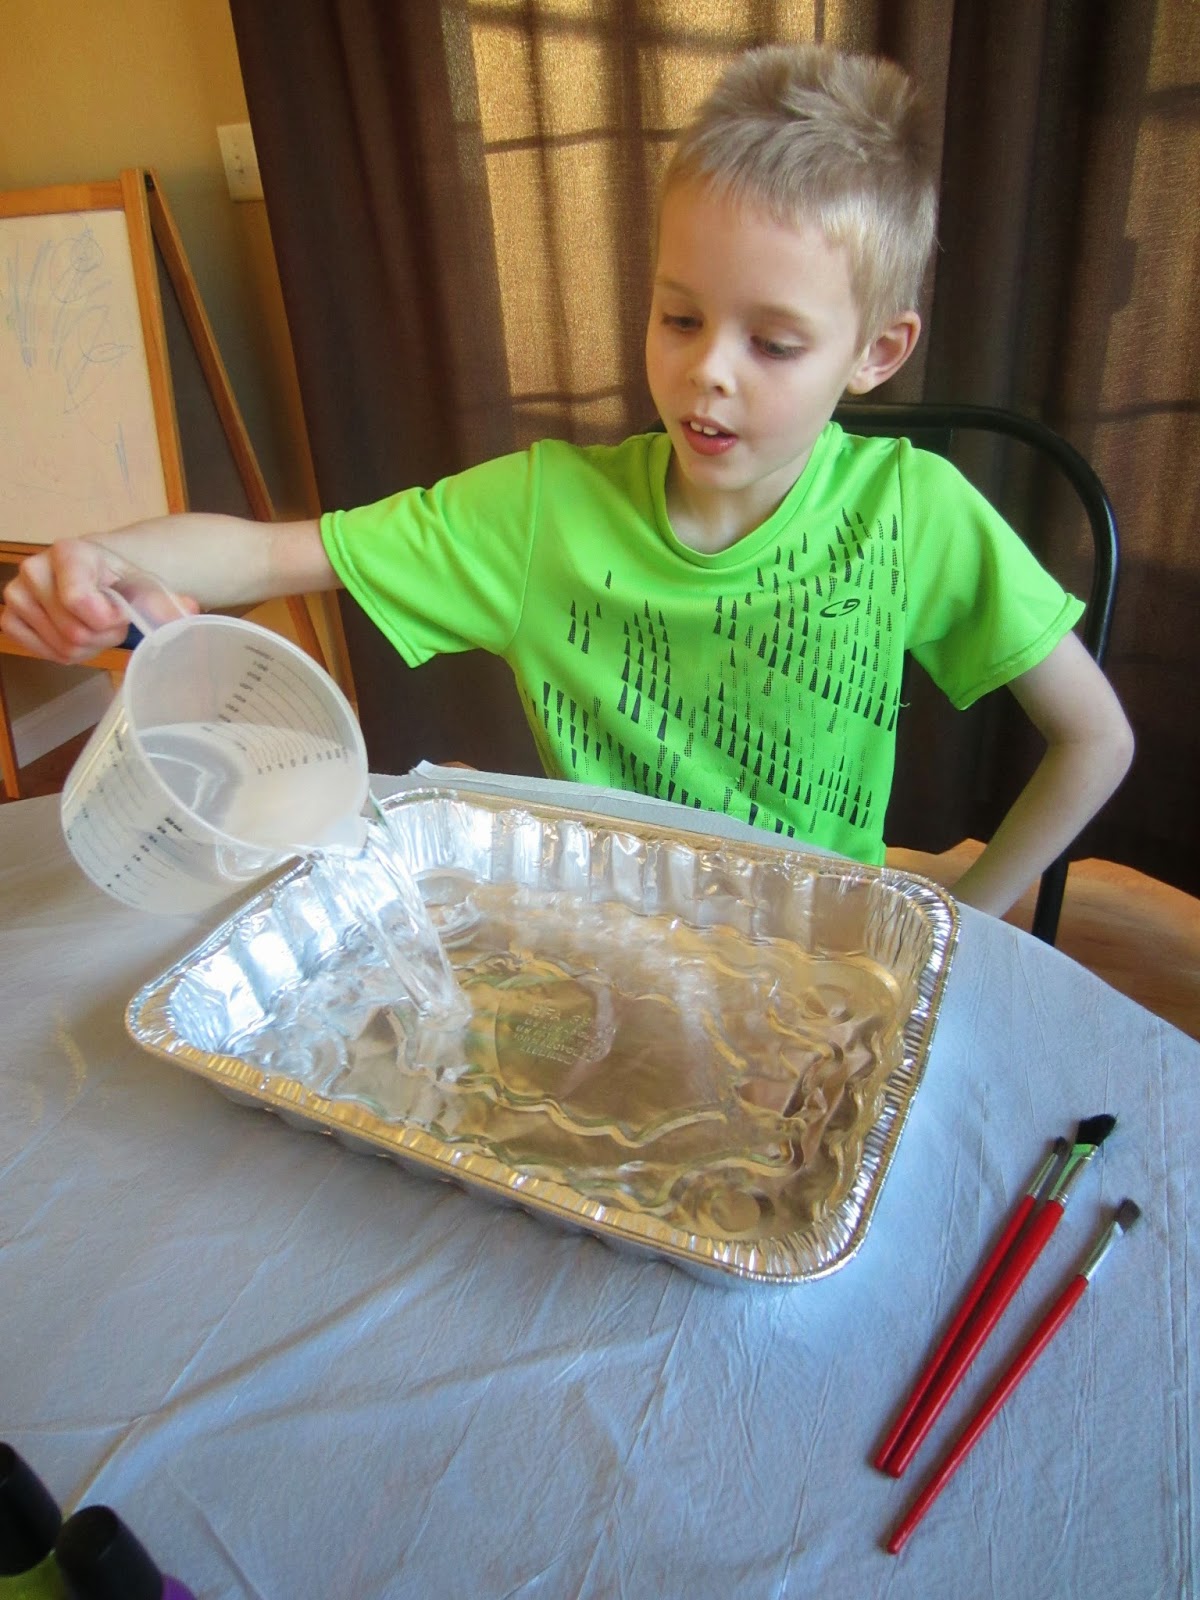
1. Fill your pan with an inch or two of water.
2. Gently drizzle nail polish in the pan. The goal is to
pour it thin enough that it sits on the surface of the water.
3. Add another color (or two or three).
4. Drag your tool through the nail polish until you get
the desired effect.
5. Softly lay your paper on top of the water and press
the corners slightly to make sure they pick up the color.
5. Carefully peel the paper off the water and set face-up
to dry. We let our marbleized masterpieces dry for a full 24 hours and since
they were still pretty stinky, I put them on our screened in porch outside. The
more time passes, the less fragrance they emit.
There are lots of opportunities for learning with this
activity. Talk to your kids about the history of marbleized paper, ask questions
like "why does some of the nail polish stay on top of the water?," "Why
does it cling to the paper?," etc.
Aren't they stunning?
Stop back later this week to see
how we are using our marbleized paper!
Wednesday, October 22, 2014
Collect, Sort, Graph, & Count Fall Leaves
The Autumn foliage colors peaked here last weekend. We
soaked in the opulence during a trip to a state park, apple orchard, and CSA
farm. The family fun was a springboard for several leaf activities, all of which
were fun.
1. Fall Leaves
Hunt
The last leaf hunt my son went on, we packed some crayons
and made rubbings. This time, we left the crayons at home and just let our eyes
search out eight various types of leaves. (Click the picture below to download a free PDF of the ID page I made.)
I clipped a page with the names and
images as a cheat sheet onto a mini clipboard. It was up to him to make tally
marks or simply X through the names or images. We tucked the leaves in a
gallon-size ziploc as we walked the trail.
2. Sort by Color
and Make a Life-Sized Graph
I pressed the leaves between layers of paper towels
(since a few were wet) under a heavy book. The next day, they were ready for us
to use. I grabbed some leftover painters tape and made a big grid on the carpet
in our living room. I made red, orange, yellow, green, brown, and purple cards
as well as a numbered set. I placed these on the grid to complete our empty
graph.
It took the boys no time at all to deduce what they were
to do. They immediately set to work. "Is this purple or brown," they
would ask each other. I loved their decision-making and how well they worked as
a team to complete the graph.
When it was done, there was a three-way tie between
brown, yellow, and red leaves. (This idea came from Little Giraffes.)
3. Sort and Graph
by Type
When we'd finished our leaf color graph. We removed the
leaves and the color cards, and I placed two other cards at the bottom of the
graph: maple and oak. Now they graphed which we had more of. The clear winner
was maple!
4. Arrange from
Smallest to Largest
As they cleared the graph of the leaves, I grabbed several
and asked our 5-year-old to put them in order from smallest to largest. He was
a little lost at first but I asked him to "Find the smallest leaf"
and it was removed. Again, "What is the smallest leaf now?" And so it
went until we had them all lined up.
5. Preserve by
Laminating
Lastly, the boys picked their favorite leaves from our
collection and I put them in plastic laminating sleeves, running them through
my personal laminator, to save and admire for weeks and months to come. They
look like stained glass in our window! (This idea came from Mama Smiles.)
Subscribe to:
Posts (Atom)