Showing posts with label Reading. Show all posts

Friday, June 17, 2016

Sight Word Search & Graph


Our youngest son (age 6) did a lot of word work this week. I'm trying my best to ward off the dreaded summer slump. That summer between kindergarten and first grade is critical. Those phonics and sight words are building blocks beginning readers need to hit the ground running when school resumes in the fall.


I thought my son might protest when I handed him a book; our reading typically happens before bed. When I gave him a half sheet of large-type graph paper, he was intrigued.

Prep
Download my free PDF of the Sight Word Search & Graph paper (or make your own).


Print the graph.
Pick a book for beginning readers, and review the vocabulary in the book. I used a Level 1 Penguin Young Reader by Bonnie Bader.


Select four recurring words and write them at the bottom of the graph. I used come, me, play, and will.

Read & Graph
Have your child read the book and look for the words noted on your graph. Each time one of the words occurs, have them color a block. For competitive kids, make it a sight word competition; which word will win?


This is a simple activity that combines early math skills with reading. My son really enjoyed it!

Wednesday, June 15, 2016

Gumball Sight Word Sort


Our six-year-old's reading skills are really coming along. But he nervously exclaimed, "Mom, I'm forgetting my sight words!" a few days ago. To keep those 100+ words he learned in kindergarten locked in his brain for good, and to especially work on those that trip him up, I cooked up a simple activity.


This word work takes hardly any time to prepare and can be used with any words your child needs to work on. For that matter, you could use the same concept to practice math facts even.

What You Need
The 1-page PDF of gumball machines
Office paper
Dot pricing stickers
Pen or marker


Download the gumball machine PDF free from Google Drive here. Print on plain 'ol office paper.

At the bottom of each machine, write one sight word. I chose four that my son sometimes confuses: them, there, here, and the. I wrote these same words in random order on the dot stickers.

When I gave him the activity, we first read the words on the machines. Then I asked him to place the stickers (aka gumballs) on the right machine, saying them as he sorted.


This simple activity works relies on repetition to reinforce learning. It's simple and whimsical. And I think my son would say fun, too.

Enjoy!


Wednesday, May 18, 2016

Silent E Apple Tree FREE Printable Game

Let's face it, the silent e is tricky. It doesn't make a sound, but changes the way earlier vowels in the word are pronounced. Ugh. What a pain for beginning readers!

To give my son some practice pronouncing words that are transformed with a silent e, I designed a fun game to play together: Climb With Me Up the Silent E Apple Tree.


What You Need to Play
FREE 5-page PDF (available on Google Drive here)
Heavyweight card stock
Paper cutter or scissors
Tape
Die
Different game pieces for each player (we used buttons)

Prep
Print the PDF on the card stock. Since your home printer won't print full bleed (i.e. all the way to the edge of the paper), trim off the white strip on the bottom of page 1 and top of page 2. Tape these pages together to form your apple tree game board.


Cut out all of the word cards and place face down in a pile under the tree.


How to Play
Place both game pieces on the word START at the base of the tree. The youngest player rolls the die first and moves their game piece the number of spaces rolled.

If the player lands on an apple, they draw a card. They must pronounce the word with AND without the silent e. If they do this correctly, they can advance two more spaces.

HINT: I like to remind my son that while the ending e is silent, it makes the <a,e,i,o,u> say it's name. In other words instead of the i in pine making the ih sound, it literally makes the eye sound. 

If they land on an empty circle, they stay put.

If they land on an apple core, they must move back the number of spaces indicated.

Play alternates between players. If a player lands on a space where a branch points them up or down the board to another space, they must move their game piece to wherever the end of the arrowed branch points.

The first player to make it to the FINISH (i.e. the bird) wins the game. This was challenging for our 6-year-old but great practice and great fun at the same time!

Read
Want a great book to read along with this? We recommend the following.

Wednesday, May 4, 2016

Words in Words (a Literacy Board Game)


Our youngest son is doing a great job on his journey to becoming a fluent reader. I've been surprised to see some of the words that he gets hung up on, though. When he knows the sight word "ate," for example, I expect him to read "gate" with relative ease. Not so, though. 

This activity is an effort to help him see words inside of words, which sometimes (not always) will be just the cues he needs to read them more quickly.

What You Need to Play
2 players
2 different game pieces (we used LEGO minifigures)
Free PDF of the cards and game board (download it here)
Dot stickers (or tape)
Heavyweight card stock (8 pieces)
Scissors or paper cutter
Marker

Assembly
Download and print the 8-page PDF file on heavyweight card stock. 


Cut out the game cards so that each has a word at the top and blank rectangle at the bottom.

Fold the cards in on themselves and write the word that's inside on the outside in marker. Use a dot sticker (like what you'd use for pricing yard sale items) folded over the top edge to seal each closed.

Put these in a pile or bowl.

How to Play
Both players put their game pieces on the START circle. The youngest player picks a game card, reads the word in marker and tries to figure out what word is inside that word (without scrambling the letters!). Once they have a guess, have them open the card.


If the word they discovered inside the main word is on the inside of the card in red, they move their game pieces the number of letters in that word. For example, if the child selects the card with the word 'seen' on it, and says 'see' is the hidden word, they'll move their game piece three spaces since there are three letters in the word 'see.' 

If there are multiple options on the inside of the card, the player can only move their game piece the number of letters in the word they guessed (so if they said 'an' and not 'ant' in elephant, they move TWO spaces, not three).

The player to reach the finish first is declared the winner.

I was shocked at how well my youngest son did with this and how much his older brother also enjoyed playing with him. If we're going to keep the enjoyment going, it looks like I'll have to make even more cards!

Friday, April 29, 2016

Turtle or Tortoise? Reading Comprehension + Art


My boys have both been fans of the Wild Kratts cartoon. It seems to ignite not only a fascination with animals, but a curiosity too - at least it has for my sons. 


Because of this and a love of art, I thought my son would enjoy this activity.

To gain some knowledge, I read him a great book about the differences (and similarities) between turtles and tortoises. Trisha Speed Shaskan's book contains simple explanations and beautiful illustrations that captivated our interest with the turn of each page.


When we were finished, I asked him if he wanted to make a turtle or tortoise. He answered the latter, so we traced a big bowl onto half of a piece of brown card stock.


We added feet and a head, and then some paper shapes in a contrasting color, laid out like a mosaic to form the pattern on our tortoises' shell. Lastly, we glued a googly eye on.

Now it was time to test his reading comprehension. 


I gave him a worksheet that I designed and asked him to cut out the slips of paper at the bottom and put each of the characteristics under the proper reptile. He got them all right!


Download the free Turtle vs. Tortoise PDF I made here.

Friday, April 22, 2016

5-minute Sight Word Uncover & Add


My son has successfully memorized 120 sight words this year. Unfortunately, not all of those words have stuck in his memory. With assessments coming up, his kindergarten teacher asked that we do some review at home.

Lately, my son has been really enjoying a Highlights' Hidden Picture book. His love for these puzzles inspired this game, in part. What I created is a basically modified BINGO game.


What You Need
Fun pictures either from photos or magazines for the game boards
PDF of the sight word game and call cards (download it here from Google Drive)
Heavyweight card stock
Scissors
Fine-tip marker
Star stickers (optional)
Timer (we used the microwave clock)

Have your own list of words to practice? Or another subject matter to quiz your kiddo on? No worries. The last page of the free PDF is a blank template.

Prepare the Game
Print the sight word pages on card stock. As a general rule, use a page of cards for each player and one to two extra pages of cards.

Cut the outer border of one sheet of game cards (the bigger square word cards). Use it to trace the shape onto one each of your pictures (I used some old LEGO Club magazine pages). These will be your game cards. Crop the excess but cutting along the lines.

Now trim one row at a time on the game cards, align with the game boards and trace a line along the edge. Use this technique until all the grid lines are drawn on each game board.

Once the boards are finished, add a star sticker (or drawn star) in one of the squares. In each of the other squares, write a number, cleverly hiding it for an extra challenge. Depending on your child's math abilities, keep the numbers small or make them bigger for harder addition.

Play
With two piles - the call cards face down and the game cards face up - scrambled, each player should add sight word cards (face up) to their game board until its filled.


Set a timer for 5 minutes. Begin selecting one by one the call cards. Have the child(ren) read the words on the cards, search their game board for that same word, and if it's present, remove it from the board.

At the end of 5 minutes, the child(ren) hunt for the hidden numbers in each uncovered square. They add them together. If the star is uncovered, they double the total.


The player with the most points is declared the winner.

Wednesday, April 13, 2016

Hungry Caterpillar Art Project


My youngest son's literacy skills are growing leaps and bounds. When I was volunteering in his kindergarten class last week, I noticed one of his classmate's reading Eric Carle's The Very Hungry Caterpillar. 

We have the board book at home, but I'd foolishly thought of it as a baby book. Not so! Most of the words are ones my son could read on his own.


To go with the book, we got out our art supplies.

Watercolor paper
Watercolor paints and brushes
scissors
paper punch
permanent black markers
pom-poms
googly eyes
pencil
low-temp glue gun (school glue could also be used)

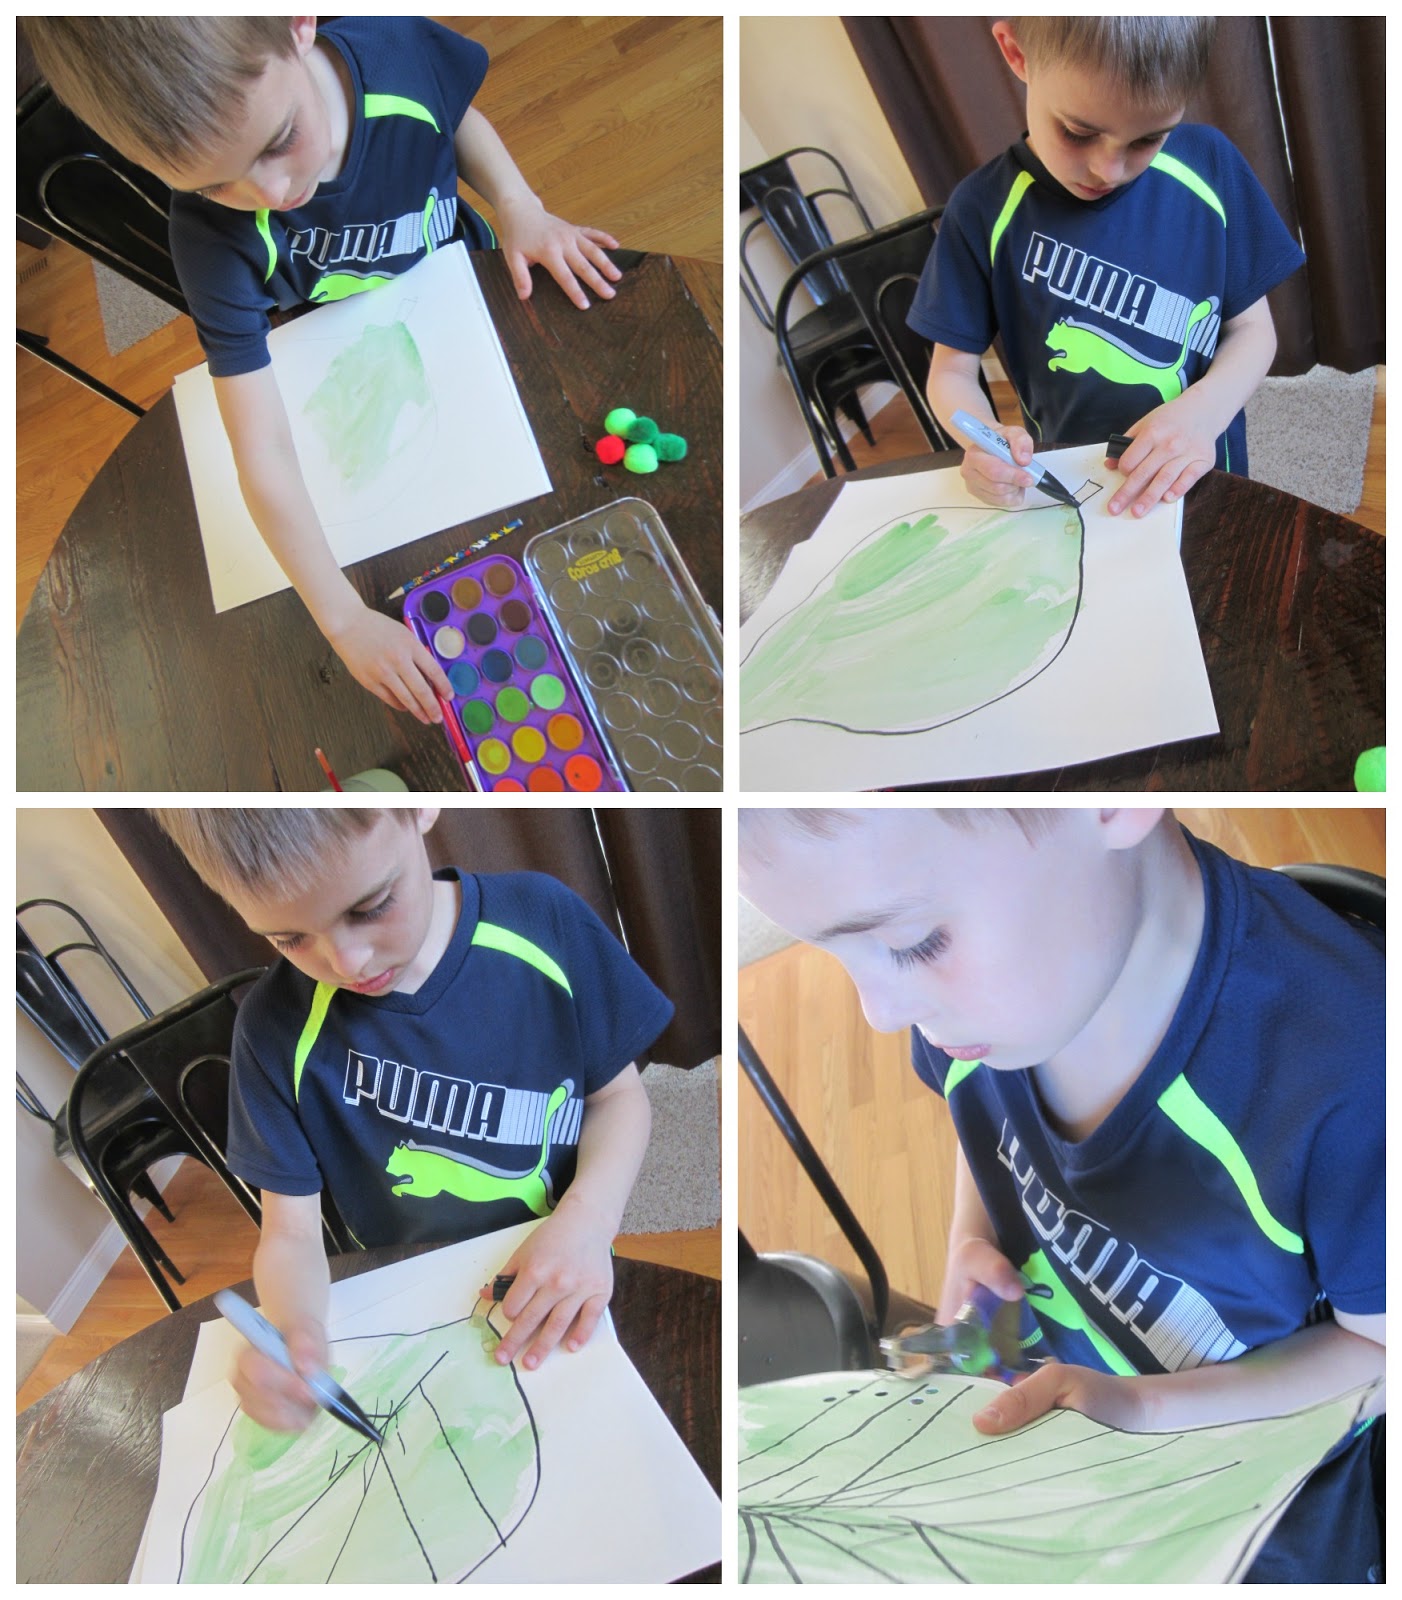
First we drew a big leaf on a large piece of art paper and used green watercolor paints to fill it in. When dried, we traced our lines and added veins to the leaf with a black permanent marker.

Once we cut the leaf out, we were able to use the paper punch to add the caterpillar's nibbles from the leaf.

I put a thick line of glue on the leaves with the low-temp glue gun and we added the pom-poms in a row to make a hungry caterpillar.


A dab of glue on the googly eyes made it possible to give our caterpillar sight.

This was a simple project that only took a few supplies and the results are positively charming. 


If you have never read the book to (or with) your child, do it!


Can't get to the library, watch this video of Eric Carle reading his book.


This great project was inspired by the Hudsonville Art Program.

Wednesday, March 30, 2016

Linking Word Family Chains -at, -am, -an, -ay, -ap (free printable)


Our kindergarten son's literacy skills are growing by leaps and bounds, but I wanted to continue to show him the pattern in words, what makes them rhyme, and how much easier it is to read when you recognize the sound of their endings. With this aim, I completed another word family activity.


This free printable can be used in a variety of ways. The flexibility makes it easy to customize for your child.

What You Need
3-page PDF of the word links (download it free from Google Drive here)
Heavyweight card stock, plain or colored paper


Prep
Print and cut out the links on the dark black lines. Scramble together

Play: Option 1
Have the child see how many words they can make by combining the links' beginning sounds with the word family endings. 


Play: Option 2
Divide the links into even piles for each child. Have them see who can make the longest chain, or complete a chain the fastest.

Play: Option 3
See how long of a chain your child can make on the floor. Can they loop it around the furniture or make it go in a circle?

Wednesday, February 24, 2016

Super Simple FREE Printable Sight Word Game


My son is on the last of the seven lists of sight words he needs to memorize before year end. He is beyond excited to master these last 20 words. In support of this mission, I devised a simple sight word review game to make practicing fun.


Not interested in the same 20 words as us? No problem. One of the three pages on the free PDF is a blank game board. Just print it out and write on your own words!

Download the free PDF from Google Drive here. REMINDER: If you are a teacher and need to request access to my printables through Google Drive, use your personal email address. In many cases, your school blocks emails coming from outside their domain, thereby prohibiting me from granting you access and notifying you via email.


What You Need
PDF of the Say that Sight Word game board and die 
Heavyweight card stock to print the PDF on
Scissors and glue to cut, fold, and finish the die
A unique game piece for each player

How to Play
Each player's game piece should be placed on the words START. The youngest player begins their turn by rolling the color die. Whatever color they land on, they will move to the first occurrence of this color on the game board. They must also say the word there. If they don't get it right, help 'em out. 


Play alternates between players. The first player to reach the green spot at the finish is the winner!

Wednesday, February 3, 2016

Polymer Clay Penguins


Our six-year-old has had a fascination with penguins since ... well, like ... forever. We have so many penguin stuffed animals it's like a colony. To add to his collection, we made a few out of polymer clay.

This is a wonderful activity that exercises fine motor skills.


Supplies & Step-by-Step
Polymer clay (we used FIMO) in black, white, and orange
A stove or toaster oven
Scissors

  1. Roll the black clay into a medium sized ball; this is the head.
  2. Roll another larger ball for the body. Squish the ball into an egg shape and stand on one end to make it slightly flat on the bottom.
  3. Either set the head atop the body and apply pressure to affix the two or after doing so, using a finger smear the clay on the head down toward the body to make a smooth bowling pin shape.
  4. Roll a ball of white clay and then flatten to an flat egg shape. Add to the penguin body.
  5. Roll two tiny balls of white clay and flatten. Either use these as the outer eyes or place the circles side by side and gently press together, pull the bottom to form a heart. Affix as the face.
  6. Roll two teeny black balls. These are the eyes. Press gently onto the face.
  7. Roll two small tubes of black. Pinch the ends and flatten for flippers. Attach to either side of the body.
  8. Roll a small football shape out of orange clay. Clip one end horizontally with scissors to make the upper and lower parts of the beak. Clip to shorter, making a flat surface with which to attach the beak. Press onto the face.
  9. Roll two tiny orange balls. Flatten. Clip two tiny triangles out of each to make penguin flipper toes. Attach to the bottom of the body.
  10. Add a hat, scarf, eyebrows, etc. to accessorize your penguin!
  11. Bake in a 250 degree toaster oven for 60 minutes (roughly 15 minutes for every 1/4-inch thickness of clay).
  12. Let cool and then play with - maybe even write a story with your new penguin as the main character or make a stop motion video!


Read
To go along with our craft, we read two books, both which cleverly address how a penguin who wants to fly handles being a flightless bird. Both are utterly enjoyable. These sweet fiction books are beautiful and fun. Check them out!


Our penguins were inspired by the creations shared at How To Instructions and Bonnie Bakes.

Wednesday, January 27, 2016

Sign Language Sight Word Decoding (free printables)


I'm not sure how it happened but the other night I explained to my boys about Koko and how they'd taught the gorilla to communicate with sign language. We watched a YouTube video which captured all of our attention.

To expose my sons a little more to American Sign Language, I made some fun printables (the boys were my hand models). Click on the links in the list below to download the free PDFs from Google Drive.
  1. A-Z alphabet cards
  2. 1-page American Sign Language Alphabet cheat sheet (on the same PDF as the cards)
  3. Sight word cards spelled with sign language for decoding

I gave my six year old son the last two of these three printables (with the cards cut apart) and explained to him that he needed to decode the sign language letters to figure out what the sight word was and read it to me. 


He enjoyed the challenge, especially because many letters resemble a fast, just with different finger formations.


To go with the activity, we read two great fiction books that provided some context for our activity. 

Wednesday, December 23, 2015

Free Sight Word Sequence Game

My 6-year-old son's kindergarten teacher has challenged kids to pass seven lists of sight words this year. While some have already passed all the lists, my son is at the halfway point.

While we are using flash cards each evening, I continue to search for fun ways to engage him in learning through play. Our sight word SEQUENCE game did just that.


Prep
Got a child in mind that needs a little sight word review? Download the game I made for free from Google Drive here. Print the game board and cards on heavy weight card stock. Trim the white edges from the game board pages, align, and tape together. 


Cut the cards apart and shuffle well. If your paper is too thin and is a little too see-through, hit the back of the card pages with spray glue, lay a piece of scrapbooking paper over top, and then cut apart.

Gather several like game pieces for each player; we use red, white, and blue poker chips.


The Objective
The first player to get four of their own game pieces on the game board in a row (horizontally or vertically) wins.

How to Play
Each player is dealt three cards and looks at their hand. The remaining card deck is the draw pile.

Players can place a game piece on any sight word they have a card for in their hand. One game piece is placed on the board per turn. 


The card played is placed in a discard pile and the player draws a new card. Players should always have three cards in their hand.


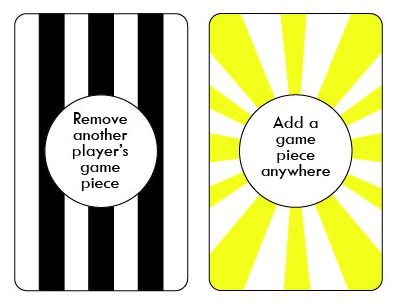
Special Cards There are two kinds of special cards in the deck: one where the player can place a game piece on ANY open space and another where the player can remove an opponent's game piece from anywhere.


The player discards the special card, and in the case of the "remove another player's game piece," they cannot place their own game piece in its place until their next turn.

Smiley Spaces The four corners of the game board are free spaces. A player can use one of these spaces as one of their four-in-a-row. These are the only four spaces on the board that more than one player can place a game piece on.

Wednesday, December 16, 2015

Bs and Ds on Bumblebees (free printable worksheets)

Those darn lowercase Bs and Ds are SO tricky for kinders, my youngest included. This, of course, isn't a new problem. Our oldest boy mixed them up too when he was younger. 

It might be time to break out our B, D, P, and Q spinner again (check that out here).

To get some more practice in, I created some fun worksheets to be used in a variety of ways. We used the first of the four yesterday. 


We started with the Bs and Ds on Bumblebees activity sheet. I handed my 6-year-old son the paper and two strips of yellow dot stickers; onto half of which I'd written upper case Bs and the other half had upper case Ds. 

It was my son's job to look at the lowercase letters on the bumblebees and cover each with its uppercase counterpart. 


This required a lot of thought and concentration, but my son did great! When he stumbled, I used the "bat before the ball" and "doorknob before the door" tricks to remind him.

Download the four worksheets I made for free from Google Drive here.


Aside from matching up dot stickers, kids can color all the Bs one color and the Ds another, or trace only the Bs or Ds, cover the Bs with flattened glass baubles, etc. These can be used in so many different ways. You can even laminate or insert them in plastic sheet protectors and use with dry-erase markers over and over.

Enjoy!

Wednesday, December 2, 2015

Word Family Board Game (free printable -at, -ug, -op, & -ail practice)

Our kindergartner is starting to read. It's incredibly exciting. I cannot tell who's more proud: him or me. To introduce him to word families, I made a fun little board game.


Download your copy for free from Google Drive here. Print on heavyweight cardstock. Double the weight of the arrow spinner by folding the paper over and gluing two plies before cutting it out. Punch a hole with a nonconventional hole punch and attach the spinner with a brad. Find different game pieces for each player.


Playing is easy. The youngest player starts. They flick the spinner and land on a letter. They'll move their game piece from the START words to the first real word that can be made with the letter they spun and the word ending (e.g. if they spin t, they'll move to -op since that makes the word top). 

Kids will love trying out the combinations of letters and word endings and giggle at the nonsensical words they make in the process. 


Play alternates between opponents. If a player lands on the SPIN AGAIN, they'll do just that and spin again to get a letter. They'll then move their piece twice to form the first two words that can be formed with the letter spun and the word endings on the board.

The first player to reach the final square on the board is declared the winner. When we played, that was my 6 year old! 

Want a great book to pair with this game? We've been reading these flip-a-word books. They're great for beginning readers and a perfect introduction to word families!

Friday, November 27, 2015

Sight Word 5-in-a-Row {free printable}


Sight word BINGO. Hm. You're probably thinking haven't she already shared this activity? 

Well, yes, I have. (See here.)

But since (I'd like to think) my design skills have improved and boy No. 2 has different sight words to practice, I've recreated new cards.


Download five playing cards and the call cards free from Google Drive here. There's also a blank card for you to add your own sight or vocabulary words!

This was a much easier way than flash cards to get our 6-year-old to practice his sight words. 


Wednesday, October 7, 2015

Sticky Ball Sight Word Target Toss

Each week of kindergarten, my son's class is working on two new sight words. I'm not wild about flash cards so I wanted to drum up another way for him to practice at home - something that would get my active boy up and moving, something that would be F-U-N.


This little game met all the criteria.

Supplies
Suction-cup balls from the party supply store
Target (download the one I made for free here)
Paper
Lamination (optional)
Markers (if laminated, use dry-erase)
Tape


Prep
Print and cut out as targets, one for every word you want to practice. If you'd like to reuse them (like I do), laminate each. With a marker (dry-erase on the laminated targets), write the sight word in the middle of your bulls eye target. Tape them to the sliding glass door so that each target is visible on the other side of the door. Your child will be reading the target through the glass.

Variation: Don't have a deck/porch with a sliding glass door, tape them to an interior wall and have your child use them as NERF gun sight word practice!

Play
Hand your child the suction-cup balls and call out the words on the targets. It's up to him/her to read the targets, take aim, and toss the ball. If he/she misses the whole target, they must try again and again until it is hit. 


Keep going until all the words have been called out! 

This is great way to make those sight words really stick in kids' brains!