Showing posts with label Plants/Animals. Show all posts

Friday, August 5, 2016

How Plants Absorb Water (experiment)


I always feel goofy sharing basic activities, but truthfully, sometimes the oldest and simplest things you can do with your kids are great learning opportunities.

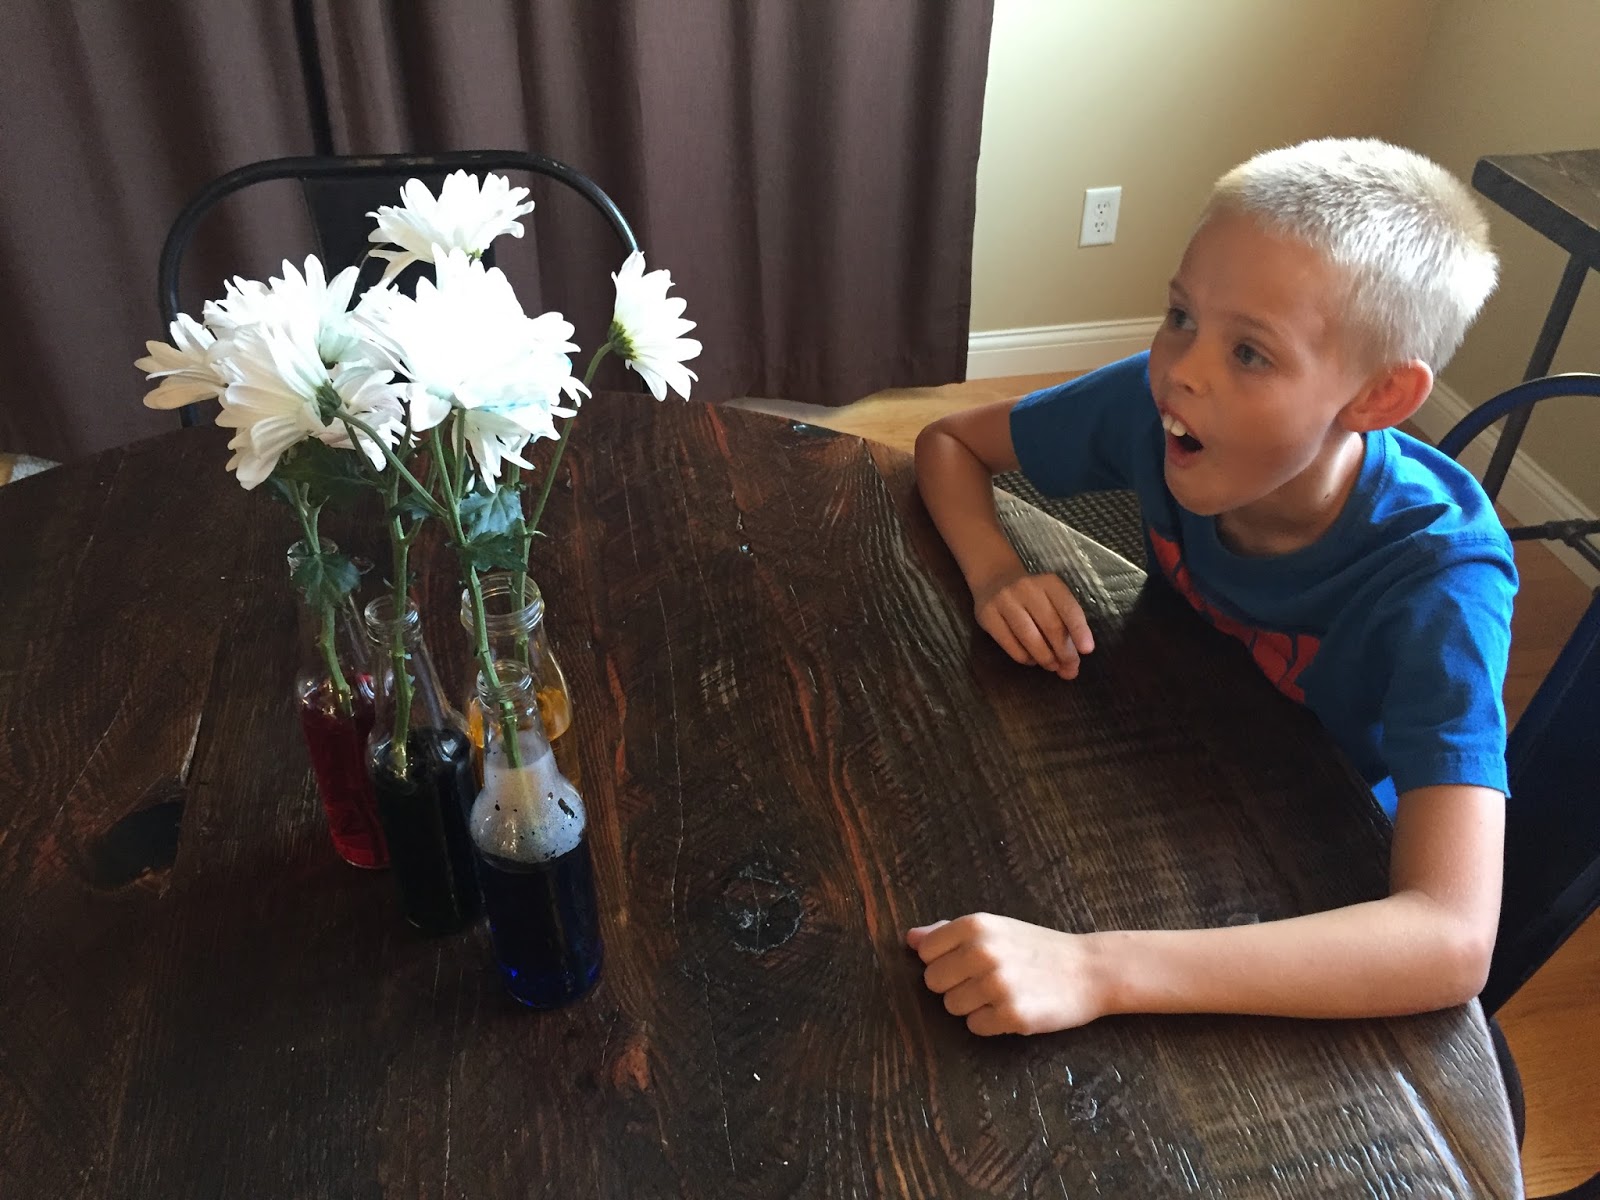
The boys learned about how plants absorb water by dying flowers. Here's how we did it.


What You Need
Food Coloring
Flowers (we used daisies)
Water
Glasses/Vases/Bottles
Scissors

What to Do
Trim your flowers, cutting the stems on an angle under running water. A blunt flat end that sits squarely against the bottom of the vase, will make it difficult for the plant to draw up water.

Add 15-20 drops of food coloring in each vase. Add lukewarm water. 


Place a flower in each and observe over the next few days or week. If desired, keep a journal!


What We Observed
Even our leaves and flower petals were tinged with the dye. The blue dye had the most impact on the appearance of the flowers. Our yellow dye hardly made a noticeable difference. The boys were astounded to see the changes.


The oldest boy hypothesized that the plant would filter out the dye and there would be no noticeable difference. This experiment proved him wrong!


Friday, June 24, 2016

DIY Play Aquarium


On our vacation, we visited the Monterey Bay Aquarium in Monterey, CA. Our little guy has talked about it several times since we've been home. It made quite the impression. To capitalize on his interest of all things fishy, I thought we'd make our own aquarium.


This genius idea came from Made By Joel. His example is artistic and modern - a real must see, so stop over there.

What We Used
A corrugated cardboard box
Craft knife
Scissors
Ruler
Pencil
Watercolor paper
Paints, markers, colored pencils, blending art tissue paper, etc.
Mono filament (aka clear fishing line)
Buttons
Glue
Tape

How We Made It
Using the ruler as a straight edge, on one side of the box I drew and then cut with a craft knife some slim channels, approximately an inch apart. I made sure the channels I cut were narrower than the width of my buttons.


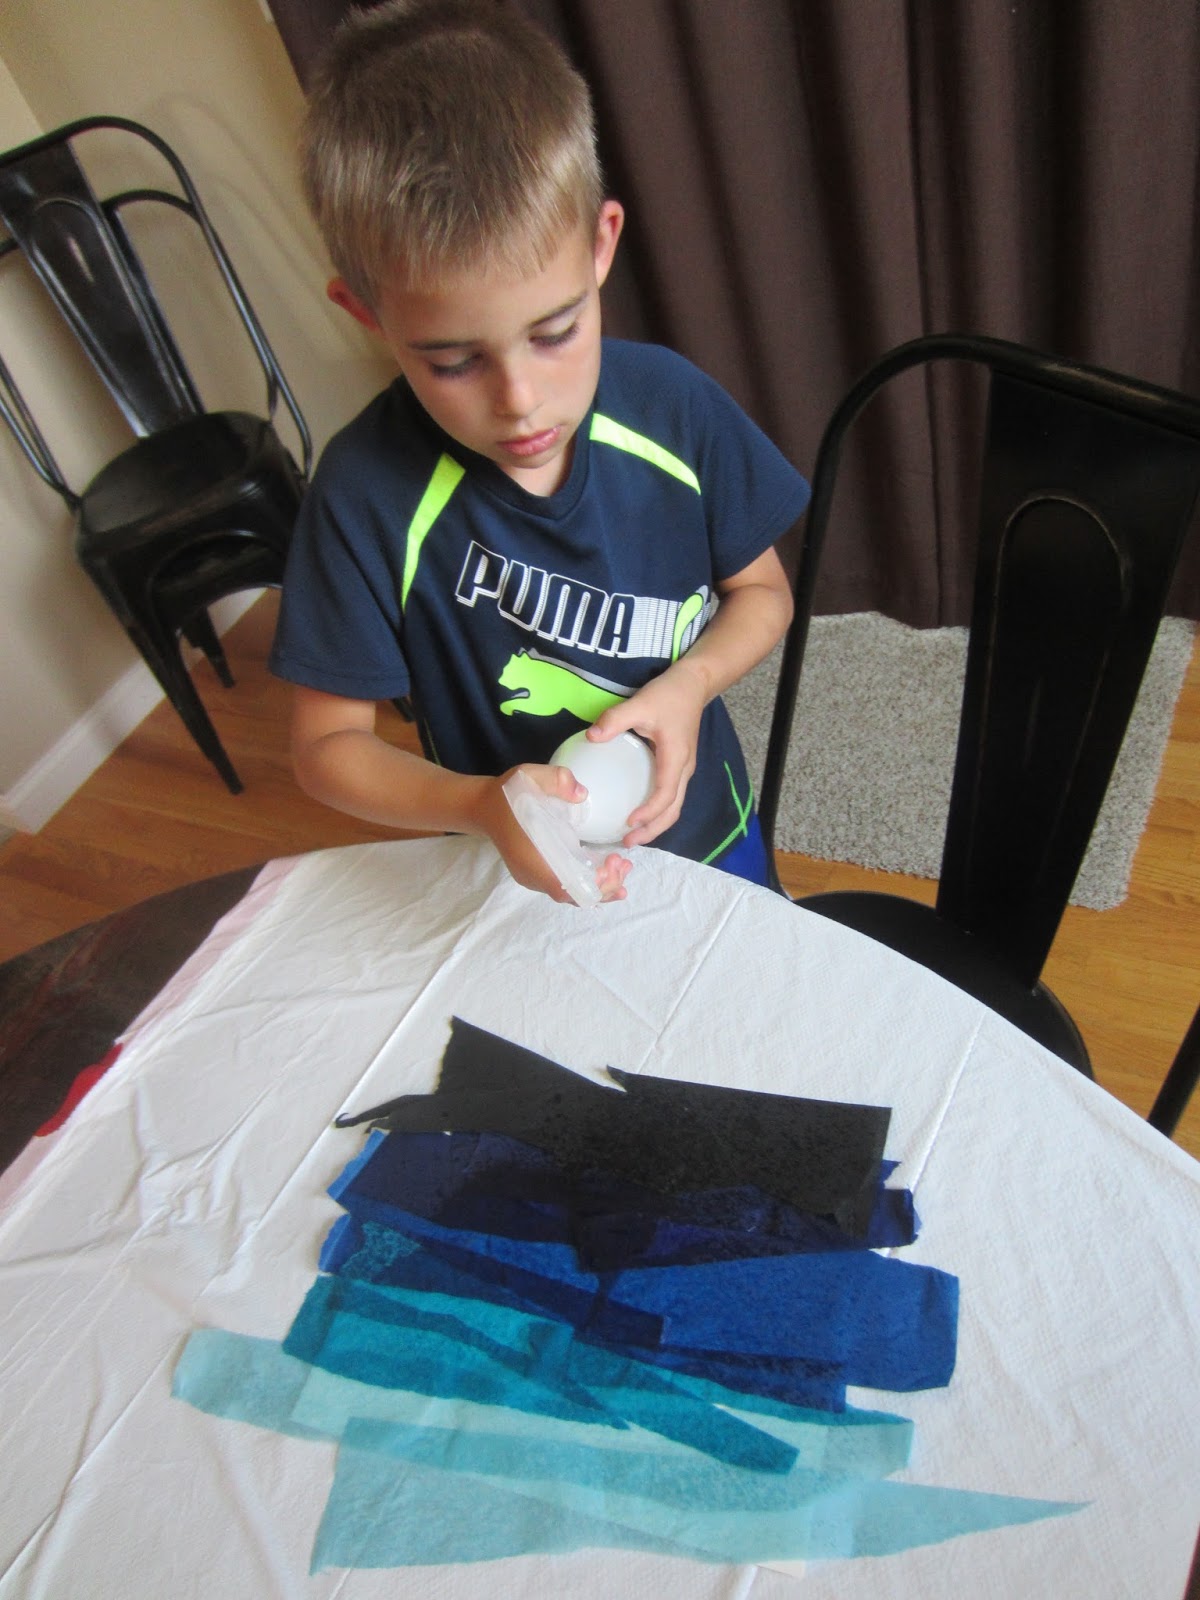
Now my son got to decorating the background of our aquarium. I gave him a piece of watercolor paper and we layered strips of bleeding art tissue paper (lightest at the top and darkest at the bottom).


Once spritzed with water, the colors began to bleed onto the paper. My son, however, wanted to press paper towels into the top of the tissue to wipe up the excess water. The stipling of the paper towels made for some beautiful texture and we decided we liked the look so our paper towel (once dried) became the background of our aquarium. I love a happy accident!


Now I cut fish shapes out of the thick watercolor paper and my son and I colored them.


I taped the end of mono filament to each fish, strung them through the slits in the box and then wound them through the holes of a button before knotting each. This enabled my son to move the fish back and forth to make our aquarium fish (and jellyfish) more active.


Read
To go with this activity, we read a wonderful book. It reminded us of our visit to the aquarium and all the phenomenal creatures we saw there. 

Friday, April 29, 2016

Turtle or Tortoise? Reading Comprehension + Art


My boys have both been fans of the Wild Kratts cartoon. It seems to ignite not only a fascination with animals, but a curiosity too - at least it has for my sons. 


Because of this and a love of art, I thought my son would enjoy this activity.

To gain some knowledge, I read him a great book about the differences (and similarities) between turtles and tortoises. Trisha Speed Shaskan's book contains simple explanations and beautiful illustrations that captivated our interest with the turn of each page.


When we were finished, I asked him if he wanted to make a turtle or tortoise. He answered the latter, so we traced a big bowl onto half of a piece of brown card stock.


We added feet and a head, and then some paper shapes in a contrasting color, laid out like a mosaic to form the pattern on our tortoises' shell. Lastly, we glued a googly eye on.

Now it was time to test his reading comprehension. 


I gave him a worksheet that I designed and asked him to cut out the slips of paper at the bottom and put each of the characteristics under the proper reptile. He got them all right!


Download the free Turtle vs. Tortoise PDF I made here.

Wednesday, February 3, 2016

Polymer Clay Penguins


Our six-year-old has had a fascination with penguins since ... well, like ... forever. We have so many penguin stuffed animals it's like a colony. To add to his collection, we made a few out of polymer clay.

This is a wonderful activity that exercises fine motor skills.


Supplies & Step-by-Step
Polymer clay (we used FIMO) in black, white, and orange
A stove or toaster oven
Scissors

  1. Roll the black clay into a medium sized ball; this is the head.
  2. Roll another larger ball for the body. Squish the ball into an egg shape and stand on one end to make it slightly flat on the bottom.
  3. Either set the head atop the body and apply pressure to affix the two or after doing so, using a finger smear the clay on the head down toward the body to make a smooth bowling pin shape.
  4. Roll a ball of white clay and then flatten to an flat egg shape. Add to the penguin body.
  5. Roll two tiny balls of white clay and flatten. Either use these as the outer eyes or place the circles side by side and gently press together, pull the bottom to form a heart. Affix as the face.
  6. Roll two teeny black balls. These are the eyes. Press gently onto the face.
  7. Roll two small tubes of black. Pinch the ends and flatten for flippers. Attach to either side of the body.
  8. Roll a small football shape out of orange clay. Clip one end horizontally with scissors to make the upper and lower parts of the beak. Clip to shorter, making a flat surface with which to attach the beak. Press onto the face.
  9. Roll two tiny orange balls. Flatten. Clip two tiny triangles out of each to make penguin flipper toes. Attach to the bottom of the body.
  10. Add a hat, scarf, eyebrows, etc. to accessorize your penguin!
  11. Bake in a 250 degree toaster oven for 60 minutes (roughly 15 minutes for every 1/4-inch thickness of clay).
  12. Let cool and then play with - maybe even write a story with your new penguin as the main character or make a stop motion video!


Read
To go along with our craft, we read two books, both which cleverly address how a penguin who wants to fly handles being a flightless bird. Both are utterly enjoyable. These sweet fiction books are beautiful and fun. Check them out!


Our penguins were inspired by the creations shared at How To Instructions and Bonnie Bakes.

Friday, August 21, 2015

Swimming Fish (A Science Experiment)

Four supplies - five if your kids are artistic - are all it takes to make artificial fish swim. This was loads of fun, which is my favorite way to teach science concepts.


What You Need
White craft foam
Baking dish of water (either jelly roll or 9- x 13-inch casserole dish)
Liquid dish detergent
Permanent markers

What to Do
Cut fish shapes approximately 2 inches long from the white craft foam. Decorate your fish with permanent markers if you want.


Cut a small rectangle out of the tail fin of each fish.


Fill a pan with about an inch of water.

Place your fish in the water, pointed in the direction you want it to swim.

Carefully drop a drip of dish detergent in the fish's tail fin notch.

Watch your fishy zoom forward!


To repeat, you'll need to dump the now soap-filled water and refill with plain water.

Note: We wanted to race two fish but found that it was tough to get the drips of soap in two fish so quickly. As soon as the soap disperses in the water, the fish won't swim.

How Does it Work
The detergent breaks the surface tension of the water, forcing the fish forward as the water molecules break apart because of the soap.

Read
The awesome activity came from a collection of everyday at-home science experiments. I highly recommend Kitchen Science Lab for homeschoolers, supplemental after school science lessons, mad science-themed birthday activities, etc.


Why not teach your kids about fish along with this activity? We read the following books, which inspired the designs of our fish and our REAL understanding of how they swim in the wild.


Friday, August 14, 2015

Growing a Bean in a Bag

We planted a garden in the spring. The kids even helped me drop the seeds in the ground for our green beans and snap peas. It was growing gloriously until the rabbits had their way with it. (sigh)

While we were all impressed with the fruits of our labor, I wanted our youngest son to see what really happens below the dirt.


To do that, we planted some beans inside and watched them sprout for nearly two weeks.

What You Need
Quart-sized clear plastic storage bag
Paper towel
Water
Dried beans (we used lima beans)
Tape

What to Do
Take one sheet of regular-sized paper towels and run it under water. Squeeze out the excess water and undo the wad.


Fold the paper towel into fourths.

Slide it into the quart-sized plastic food storage bag so it lays flat.


Place 2-3 beans about an inch up from the bottom of the bag. Zip the bag ALMOST closed; you want to leave it open an inch to vent.


Tape the top of the bag to a sunny window so that you can watch the beans sprout.


The bag creates a greenhouse effect and within a week, you'll notice part of your bean breaking apart and roots forming.


Two weeks later and you may even see the sprout leafing out!


Read
We read the PERFECT book with this activity. If you do this, I highly recommend One Bean!


Extension
For older kids, why not have them journal their observations about the bean as it changes?

Wednesday, October 22, 2014

Collect, Sort, Graph, & Count Fall Leaves


The Autumn foliage colors peaked here last weekend. We soaked in the opulence during a trip to a state park, apple orchard, and CSA farm. The family fun was a springboard for several leaf activities, all of which were fun.


1. Fall Leaves Hunt
The last leaf hunt my son went on, we packed some crayons and made rubbings. This time, we left the crayons at home and just let our eyes search out eight various types of leaves. (Click the picture below to download a free PDF of the ID page I made.)


I clipped a page with the names and images as a cheat sheet onto a mini clipboard. It was up to him to make tally marks or simply X through the names or images. We tucked the leaves in a gallon-size ziploc as we walked the trail.


2. Sort by Color and Make a Life-Sized Graph
I pressed the leaves between layers of paper towels (since a few were wet) under a heavy book. The next day, they were ready for us to use. I grabbed some leftover painters tape and made a big grid on the carpet in our living room. I made red, orange, yellow, green, brown, and purple cards as well as a numbered set. I placed these on the grid to complete our empty graph.

It took the boys no time at all to deduce what they were to do. They immediately set to work. "Is this purple or brown," they would ask each other. I loved their decision-making and how well they worked as a team to complete the graph.


When it was done, there was a three-way tie between brown, yellow, and red leaves. (This idea came from Little Giraffes.)


3. Sort and Graph by Type
When we'd finished our leaf color graph. We removed the leaves and the color cards, and I placed two other cards at the bottom of the graph: maple and oak. Now they graphed which we had more of. The clear winner was maple!


4. Arrange from Smallest to Largest
As they cleared the graph of the leaves, I grabbed several and asked our 5-year-old to put them in order from smallest to largest. He was a little lost at first but I asked him to "Find the smallest leaf" and it was removed. Again, "What is the smallest leaf now?" And so it went until we had them all lined up.


5. Preserve by Laminating
Lastly, the boys picked their favorite leaves from our collection and I put them in plastic laminating sleeves, running them through my personal laminator, to save and admire for weeks and months to come. They look like stained glass in our window! (This idea came from Mama Smiles.)


Wednesday, September 17, 2014

Counting Apples {Pegboard Practice}


If you've been following my blog recently, you've seen our pegboard. Some plywood and nails are all it takes to make a great study aid.


My sons love it, especially our 5 year old. We use it to practice matching upper and lower case letters quite a bit at night before bedtime stories. To mix it up, I thought I'd make him numbers pages using some fun apple graphics I made.


Download all three apple pegboard pages for free here from Google Drive.

Our youngest son enjoyed counting the red apples, green apple cores, leaves and apple seeds, and stretching rubberbands from each grouping to the right numeral.


Afterwards, we read some great books about apples and counting. 

Wednesday, September 10, 2014

Fall Leaves BINGO


We love a good BINGO game and with the temps dropping, leaves will soon be falling as well. To mix a little natural science lesson in with our play, I made a game that is perfect for autumn (which will be here before we know it).


What You Need
Paper
Game pieces such as buttons, coins, bottle caps, acorns, etc. (We used poker chips.)
10-page PDF (download it free from Google Drive here)
Paper cutter/scissors

The game I made contains 10 different types of tree leaves randomly arranged on six game cards. There are four pages of call cards that need to be cut apart and shuffled before play begins.


How to Play
The game is played like a traditional BINGO game. Players put a game piece on the FREE space and then on all spaces called as the cards are flipped over one by one. The first player with five in a row (vertical, horizontal or diagonal) wins!


For an alternative way to play, try black-out and see which player covers every space on their card first.

Books to Pair with the Game
We read some great fiction and non-fiction after playing a few rounds. Here are our picks.


Our 9-year-old son read Ellen Rene's science detectives book that described why the leaves change color. The book really expanded his vocabulary, explaining terms like photosynthesis and chlorophyll.

I read Leaves Fall Down to our 5-year-old. This fiction book provides a basic explanation of why the leaves turn. It was perfect for introducing the science concept to my little guy, without being too detailed or advanced.

Lastly, we all read Lucky Leaf. The book begins with a boy whose mother makes him abandon his video game to play outside. It felt like a page right out of my own playbook. There's no science in this book; it's pure whimsy. Both boys enjoyed it.

Wednesday, September 3, 2014

Red-Eyed Tree Frog Count & Clip Cards


My just-turned-five-year-old son's number sense is really improving, but to help further his association of numbers and numerals, I used the frog graphic I created for our Numbers Froggy Hop to make some clip cards.


This activity is perfect for a busy bag. Take it in the car, to a restaurant, hand it over while you're making dinner, or just trying to have a phone call with a friend (PUH-LEASE tell me I'm not the only parent that gets interrupted a zillion times while on the phone).

What You Need
2 pieces heavyweight cardstock
lamination (optional)
PDF of the cards (download it free here from Google Drive)
10 clothes pins
A kid


What to Do
Kids count the red-eyed tree frogs on each card, then using their fine-motor skills, squeeze a clothes pin and close it over the number of frogs represented. Simple. Smart. Fun!


Read
Want to tie in a little science knowledge to this math lesson? Why not read the book Red-Eyed Tree Frog, which teaches kids that these critters are nocturnal, eat moths, and are food for snakes. It's non-fiction that reads like fiction. We loved it!

Friday, August 29, 2014

Recycled Soda Bottle Floating Turtle


This project meets all of my criteria for a good craft.

Simple? Check.

Cheap? Check.

Adorable? Check. Check.


Here's how we made it and what you need.

Craft foam in a color of your choosing
Small, clean empty soda bottle
Yarn
Darning needles
Hot glue (optional)
Button
Scissors
Turtle template (download mine free here or get creative and draw your own)
Pen or fine-tip permanent marker

First trim your bottle down so you just have the very bottom (parents should exercise caution and do this step if children are not proficient with scissors).


Now trace the turtle pattern or draw your own onto the craft foam. Cut out.


Draw eyes and other features. My boys were too excited to spend much time on details. They wanted to get their turtles in the water! We're lucky "Lightning" and "Green Lantern" were even given eyes.

Next, apply a few dots of hot glue on the cut edge of your bottle and place it on your turtle, giving him his shell. The glue is optional, but helps to keep it in place as little hands stitch thread over and around the shell. (In hindsight, you could probably just glue the shell on, but I like the look of the yarn and it gave my kids some great fine motor practice.)

Then, thread long lengths of yarn onto a darning needle. Tie at knot at one end. Have kids pull the needle up from the bottom of the turtle and bring it back down through the foam on the other side of the shell, stitching a asterisk type of pattern. Sewing was my oldest son's favorite part of the project (who knew?!?). When done, either knot the yarn on the back or glue it down.


Now add a button with glue to the top of the shell where the yarn intersects to keep it from slipping off the turtle's back.

Take your turtles to the water (in our case, the bathtub) and watch them float on the surface!


Want a great book to pair with this activity?


Our oldest son (age 9) really liked Gail Gibbon's book Sea Turtles. It covered everything from the anatomy of sea turtles to the threats to their existence. Details, details, details, and beautiful watercolor illustration to go with them - that's what you and your kids can expect.

Our youngest son (age 5) and I read the Level 2 National Geographic Kids easy reader titled Sea Turtles. Author Laura Marsh, provides basic information in the main text and the opportunity for readers to dig deeper with turtle terms, extra facts, and even fun jokes. This book is scalable to kids of many ages. Pick how much to read and share depending on your child's attention span and level of comprehension. Or for children who are reading, hand them the book and let them choose!

This great activity came from Good Home Design.

Wednesday, August 27, 2014

Numbers Froggy Hop Game


Our young son has counting down, but associating the numbers with the numerals is coming slower to him. To help practice, I made a fun game (perfect for a kinesthetic learner!).

It's short, sweet, and simple. And it gets children moving.


This game is geared toward one player, however, you could easily adapt it for siblings or classmates to play along.

What You Need
8-page PDF of the lily pads, flowers, and die (download it free here)
poster tack or tape (optional)
heavy weight cardstock (6 green, 2-4 white)


What to Do
Consider your child's proficiency with numbers. You may want to only play with numbers 0-5. If so, print the first three pages of the 8-page PDF onto green cardstock. Otherwise, if you're playing with the full set of numbers (0-10), print the first six pages onto green cardstock.

Print the pages of water lilies and die onto white cardstock. Again, think of your child's early math skills. If playing with numbers 0-5 print one die. If playing with 0-10, the child will either have to roll the die twice or you can create two dice to have the child roll. The latter is perfect for kids that still need to see the objects to count them. Older kids working on simple addition might enjoy the challenge of adding the two numbers in their head after rolling the same die twice.

Cut out the water lilies, lily pads, and die (or dice, if you printed two). Score the lines on the die with the backside of a butter knife, fold and glue into a cube shape. You can laminate the lily pads and flowers for added durability if desired.

How to Play
Set the lily pads on the floor in a random pattern.

Because we were doing this activity on hardwood floors and I didn't want my son to slip on the lily pads, I used poster tack to secure them in place. I also added a piece of poster tack to the back of each water lily flower.


Here's the play-by-play:
1. Child rolls the die (or dice).
2. Child counts the frog faces that land face up.
3. Child looks for the lily pad with that numeral.
4. Child jumps to the lily pad.
5. Child places a water lily on the lily pad to signal that he/she has already visited there.
6. Play continues until all lily pads have a flower or the child's attention wanes.

Variations: You can time the child to see how many different lily pads they jump to in 5-10 minutes. An opponent can then take their turn and try to beat the first player's score.

Want a great book to pair with this activity? Here's a few counting frog picture books we read. They're all perfect for this fun game.