Friday, August 14, 2015

Growing a Bean in a Bag

We planted a garden in the spring. The kids even helped me drop the seeds in the ground for our green beans and snap peas. It was growing gloriously until the rabbits had their way with it. (sigh)

While we were all impressed with the fruits of our labor, I wanted our youngest son to see what really happens below the dirt.


To do that, we planted some beans inside and watched them sprout for nearly two weeks.

What You Need
Quart-sized clear plastic storage bag
Paper towel
Water
Dried beans (we used lima beans)
Tape

What to Do
Take one sheet of regular-sized paper towels and run it under water. Squeeze out the excess water and undo the wad.


Fold the paper towel into fourths.

Slide it into the quart-sized plastic food storage bag so it lays flat.


Place 2-3 beans about an inch up from the bottom of the bag. Zip the bag ALMOST closed; you want to leave it open an inch to vent.


Tape the top of the bag to a sunny window so that you can watch the beans sprout.


The bag creates a greenhouse effect and within a week, you'll notice part of your bean breaking apart and roots forming.


Two weeks later and you may even see the sprout leafing out!


Read
We read the PERFECT book with this activity. If you do this, I highly recommend One Bean!


Extension
For older kids, why not have them journal their observations about the bean as it changes?

Monday, August 10, 2015

After School Linky (8-10)

Welcome to the party!

It's not too late for a little refresher before school starts! Here are some fun ways to engage your child in a learning experience.


Humpty Dumpty Science Ideas from Science Sparks


 Ocean I-Spy Printables at Gift of Curiosity

 Teaching Even and Odd Numbers at You Clever Monkey

What's the Missing Number at Dabbling Momma

The After School Linky is cohosted by
Relentlessly Fun, Deceptively Educational
We would love to have you link up your School-Age Post (Ages 5 and up) about your learning week after school including Crafts, Activities, Playtime and Adventures that you are doing to enrich your children's lives after their day at school, home school, or on the weekend!
When linking up, please take a moment to comment on at least one post linked up before yours and grab our after school button to include a link on your post or site! By linking up, you're giving permission for us to share on our After School Pinterest Board and feature an image on our After School Party in the upcoming weeks! 

Friday, August 7, 2015

How to Make a Balloon Whir (Sound Science)


I love it when a science lesson takes zero prep and no money. This little experiment was conducted with supplies we already had around the house:

Hex nut (1/4-inch or larger)
Latex Balloon
Marble (optional)

Here's how we made an average party balloon whir like it had a motor.


Step 1
Put the hex nut in the balloon. Make sure it drops all the way in.


Step 2
Blow up the balloon, while still holding it down. Do this to avoid any possibility that the hex nut will be sucked back into your mouth while blowing it up. (Parents: This would be a GREAT step for you to do!)


Step 3
Tie the balloon.

Step 4
Grab the balloon with your whole hand. (Holding onto the tied knot won't work.) Imagine you're holding a bowling ball, except it's a balloon.

Step 5
Move the balloon in a circular motion. You'll hear the hex nut bouncing around inside for awhile, but soon enough, it'll start whirring like your balloon has a motor inside it!

The sound is so intriguing. My youngest son and I did this and in seconds my oldest son was begging for his own balloon and asking, "how did you DO that?!?"


We also put a small glass marble in a balloon to see if it too would whir. No such luck! My 9-year-old had a great hypothesis about why the marble didn't make the same sound.

How does it work?
The balloon's shape forces the hex nut to move in a circular motion; this is centripetal force in action. Because the hex nut has straight sides, the nut vibrates as it moves inside the balloon. This vibration is what makes the whirring sound.

When we tried the marble and there was no whirring, we were able to deduce that it was due to the hex nuts' sides!

This great activity came straight out of the pages of Steve Spangler's book Naked Eggs and Flying Potatoes. Not only does it contain LOADS of totally doable at-home science experiments, it also contains great photos, and thorough explanations behind the science of each. We highly recommend it!

Wednesday, August 5, 2015

You're on a Roll - CVC Dice Game


Our almost six year old is starting kindergarten in less than a month. Where oh where did the summer go? We're still working on sounding out letters and words to reinforce his phonics knowledge.

I made a fun CVC activity for him to practice phonics, blending sounds, and early reading skills.

The game has three DIY dice, two with consonants and one with the vowels.


He rolled them all and with help we checked to see if he'd made a real CVC word or a nonsensical word. If one die rolled "YOU CHOOSE," he could use the other two letter rolled and choose the third letter to form a word.

My son is a long way from thinking of words on his own or knowing their spelling. I gave him a list of words for him to reference. 


We made a game out of it and took turns rolling to see which one of us (him or me) could make more of the CVC words on the list, circling each as we rolled it.

This free download is the third iteration of the activity. The first two ways to play were WAY more complicated than they needed to be. All you need is a kid to show you how to take the game you designed and play it the best way - the easiest, most fun way. I should have consulted him first!

Download the game here. Print on heavyweight cardstock, cut out, score the lines and fold your dice. I used a low-temp glue gun to glue the tabs together.


Monday, August 3, 2015

After School Linky (8-3)

Welcome to the party!


Eek! I'm registering my boys for school this week. Where did the summer go?

Need some great (fun) educational activities to flip the kids brains back into high gear?
Never fear!

Here are some of my favorites from last week's party.


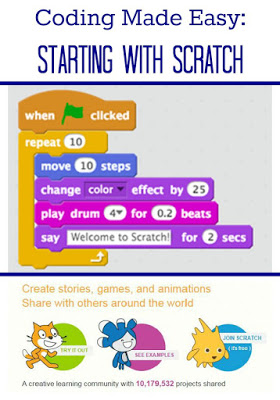
Discovering "Scratch" at Planet Smarty Pants.


Stock Market Basics for Kids at Pragmatic Mom.

The After School Linky is cohosted by
Relentlessly Fun, Deceptively Educational
We would love to have you link up your School-Age Post (Ages 5 and up) about your learning week after school including Crafts, Activities, Playtime and Adventures that you are doing to enrich your children's lives after their day at school, home school, or on the weekend!
When linking up, please take a moment to comment on at least one post linked up before yours and grab our after school button to include a link on your post or site! By linking up, you're giving permission for us to share on our After School Pinterest Board and feature an image on our After School Party in the upcoming weeks!