Monday, August 20, 2018

PLACE VALUE (cater)'PILLARS

This activity has been rattling around in my brain for months. And thanks to a rather lengthy hiatus from blogging, that's where it stayed. Until now.


Help kids review place value with this download, a little glue, and some crayons. Kids can play by themselves, with a friend/sibling/classmate, or as part of a whole classroom of buddies.


Prep
Cut and assemble the die. (It's sturdiest when printed on card stock; a glue gun makes assembly easier.) Print the game cards. The PDF has one page of cards where the columns are labeled (best for kids that are developing the skill or need a refresher) and another where the labels are absent for a greater challenge. Print whichever is most appropriate for your child(ren).

How to Play
Each child gets a game card. (Yes, the numbers on both cards are the same. It doesn't matter so print as many copies as you need.)

Roll the die and color the entire circle surrounding the number in the place value indicated face up on the die (e.g. Millions, Hundred Thousands, Ten Thousands, Thousands, etc.). If you roll COLOR THE LARGEST NUMBER or COLOR THE SMALLEST NUMBER and there are two of that number in the row, select one of your choosing.


The next roll, color the number you rolled on the next row down. You'll only color one circle per row.

Objective
The hope is to color numbers that connect to make a Place Value (cater)'Pillar! See how many you can make and how long they are; any two connected numbers make a 'pillar.

This was a great refresher for our 9-year-old son, who was thrilled to make a caterpillar longer than mine.


Wednesday, December 6, 2017

Spelling Hints: Making Memorization Easier

Our youngest son struggles with spelling. He's finally figured out the b and d, but frequently still writes words with random capital letters. This year has been a struggle. Some of the typical memorization games I designed for our oldest son haven't seemed to improve the outcome of his weekly tests. It just wasn't sticking.

No two kids are alike. 

To make it easier, I've been giving him tricks - sometimes visualizations, sometimes jingles, and sometimes a silly sentence. Guess what? Test scores are rising!

Here's a few examples of what we've done the last few weeks.

SPELLING WORD: YOUNG
My son kept leaving the u out of young. I told him to remember: U are young!

SPELLING WORDS: -EA and -EE WORDS
I knew this was going to be a gargantuan challenge. I divided the list. Once I had all the -ee words, I made a sentence for him to remember: "Free wheel for sheep that sneeze between their teeth." To make it more memorable, we sang it. Any other words he's tested that are not in this sentence are -ea words. This trick helped him during our first few nights practicing. Eventually, he didn't have to sing the jingle sentence. He had memorized which words were -ea (beach, eat, teach, reason, etc.) and which were -ee!

SPELLING WORD: BIRTHDAY
Every time my son spelled birthday, he said the second letter was an a. I told him to look at the word. Do you see the birthday candle in the word? YES! This visualization really did the trick (pun intended)!

SPELLING WORD: RAISIN
There's no z in raisin, but try telling that to my son two weeks ago. I told him to remember, "snakes (drawing an s with my hand) like raisins."

SPELLING WORD: FENCES
That c sure sounds like an s, doesn't it? To help my son remember, we came up with the hint: Do you "c" fences?

SPELLING WORD: TRAIN
Sometimes I point out words within words to help my son. When he spelled train initially, he left out the r. I showed him train is really t-rain. BOOM! No more missing letter!

A few hints, a simple song, or a silly sentence have made all the difference for us. I hope some of these tips help you and your kids!

Sunday, October 1, 2017

A-MAZE-ING Spelling Practice

Our 2nd grade son has been doing activities I made for our now 12-year-old son. It's been fun to rediscover so many of the activities I created years ago. Since our two boys are very different, it's still fun to create customized activities for him. And since he loves mazes and needs to practice spelling, this is one such activity.


I made four mazes. One for a 7-letter word, 6-letter word, 5-letter word, and 4-letter word.


Imagine the bottom boxes filled in with the letters in your child's spelling word. Follow the lines up to the shape above and add the respective letters there. Download a PDF of the four mazes from Google Drive here (remember, teachers, to use your personal email address if you need to request access as your school probably limits messages from outside their domain). 


This is quick, simple, and fun. Spelling practice doesn't have to be boring. Just make it a-MAZE-ing!

Wednesday, February 1, 2017

Addition Math Fact Dash {printable board game}


It's no secret. I hate flash cards. They're so ... not fun. To give my 1st grade son a little practice with simple addition and turn repetition into memorization (hopefully), I made a simple board game.


What You Need
Free two-page download of game board and spinner (download here)
Two pieces heavyweight cardstock
Printer & ink
Brad (to make the spinner spin)
Scissors
Small game pieces (different for each player)


How to Play
Game pieces are placed on the start square. The youngest player spins first. He/she solves the addition problem and moves their game piece to the nearest square with the answer. Turns alternate between players until a player gets the math problem where the answer is 5, the final square on the board.

Enjoy!

Wednesday, December 7, 2016

Number Grid Puzzles (free printable)


Our youngest son had a "fill in the missing numbers in the number grid" math assignment. I thought it would be a snap for him, but as he sometimes transposes numbers, it became a source of major frustration. Oy!


To familiarize him a little more with number grids and some of the quick addition and subtraction you can do with them, I made a few activities. These were inspired by Playdough to Plato's peek-a-boo chart and Mrs. T's First Grade Class number puzzles.

You can download this 100 number grid activity for free from Google Drive here. It's a 3-page PDF. 

NOTE: If you are a teacher, use your personal gmail account if it requires you to request permission. Most school districts restrict emails from outside their domain, and therefore I can't grant access and let you know it's available.

Activity #1: 10 more, 10 less, 1 more, 1 less
I printed the number grid on white card stock. I printed page two of the free printable PDF on colored card stock. I cut the center plus-sign out. Then I added white gift wrap tissue squares to the plus signs "arms" making those squares translucent (vellum would work well too), and left the center empty. For the sake of durability, I ran this sheet through my laminator.


With the 10 more, 10 less, 1 more, 1 less page laminated, I wrote some simple math problems on it in the blank area (e.g. 13+10= , 47-10=, 91+1=, 74+1=) with a dry-erase marker. My son placed the laminated page over the number grid so the first number in the equation was in the center. Then he could easily see in the translucent squares which was his answer (i.e. 10 less was directly above, 10 more directly below, 1 more to the right, and 1 less to the left). This made solving the math problems easy!


Activity #2: Number Grid Puzzles
Now I printed the number grid on colored card stock and printed an empty grid on white card stock. I cut the colored grid apart into a variety of puzzles that were about 10-11 squares each. 


Once done, I cut the number squares apart and handed him a few piles of puzzles. He arranged them wherever on the blank grid, remembering 10 less is above, 10 more is below, 1 more is on the right, 1 less is on the left. When he completed this puzzle, he moved on to the next. You can make approximately 7-8 puzzles per grid.


Friday, October 21, 2016

Telling Time by the Hour (Simple Printable Game)


One of the most important aspects of telling time is understanding which hand tells you the hour, and which tells you the minutes. To help my son practice telling time by the hour, and beginning to memorize which hand does just that, I made him this fun and simple game.


What You Need
My 2-page PDF (download it for free from Google Drive here)
Heavyweight card stock
Scissors
Unconventional hole punch (optional)
Brad
12 game pieces for each player (we used the flattened glass marbles)


Prep
Print one handless clock game board for each player. Print the clock spinner on heavyweight card stock. Fold over the paper at the bottom to double the thickness of the spinner. Glue the folded paper down and cut the spinner and clock out. 

Either poke a hole with a nail through the center of the clock and spinner (or use an unconventional hole punch). Thread the brad through the hour hand and clock, separating the prongs at the back of the clock.

Play
The youngest player starts first and flicks the hour hand on the spinner. Wherever it lands, they must read the clock and tell the time. Then they will take one of their game pieces and put it over that number on their clock game board (e.g. if a player flicks the hour hand and it points to seven, they say "It's seven o'clock" and put the game piece over the seven on their game board clock). 


The next player does the same. If you already have a number covered that you spin, your turn is over. The next player uses the spinner.

The first player to get all the numbers (aka o'clocks) covered on their game board is the winner.

Read
We read three books with this activity.

Friday, September 23, 2016

Skip Counting Connect-the-Dots Letter Puzzles


My 1st grader came home from school the first week and was distraught that he'd had trouble skip counting by 2s. "Can we practice, Mom?" Um ... yeah!

Since his teacher is also sending home short lists of consonant-vowel-consonant (CVC) spelling words, I thought I'd combine the two skills.


I made connect-the-dot pages that when finished form the letters of the alphabet (capital letters only at this point). 

Download the 13-page PDF for free from Google Drive here.


I grabbed the spelling list and printed the pages with the letters I needed, cut them apart, labeled them 1-3 so he'd know the order of the letters, snipped the corner of each page (so he wouldn't know which letter he was working on), and told him to start with the star and count by 2s.


He was amused and truly enjoyed the discovery aspect of this activity. First, it was fun to see what letter he made. Then it was fun to see what word the three letters formed (e.g. web, hen, pet, pen, etc.).

Thursday, September 1, 2016

Change Exchange (free printable money game)


When big brother took his piggy bank coins in to the bank this summer, little brother was mighty jealous. Since he's only had his bank since Christmas, there was only $7.58 in it (which paled in comparison to the $56.36 our oldest had). 

He was confused about which coins added to a dollar. To reinforce coin equivalents (e.g. two dimes and a nickel equal the same as a quarter), I made a fun little board game.


I was surprised to see how much my 7-year old enjoyed it. He and I were having so much fun that our 11-year old asked to play next time!

What You Need
PDF of the game board, equivalent cards, and $1 fake money (download it free from Google Drive here)
Heavy weight card stock (white)
Green paper
Scissors or paper cutting tool
Lamination
Dry-erase markers
Die
Small objects to use as game pieces (a different one for each player)
Paper towel to erase the marker

Prep
Print the game board on white card stock.Trim the white border off the one edge on each page so the spaces meet up perfectly. Tape together.


Print the $1 page on green paper. Plan for $3 per player. You may need to print extra copies of this page depending on how many individuals are playing.

Print the equivalent cards on paper (office or card stock) and laminate. You'll want 2-3 for each player.

Cut all the money and equivalent cards apart.

Play
Each player puts their game piece on the word START. They roll the die and move their game piece the number of spaces rolled. Whatever coin they land on, they will cross off with the dry-erase marker on one of their equivalent cards.

When a player has crossed through all five pennies on that equivalent card, they can erase the marks with a paper towel and cross through one of the nickels on either the two nickels = a dime equivalent card or two dimes and a nickel = a quarter card.

Players continually cross through coins until the cards are filled and then they're erased and a coin of the equivalent value is marked through.


If they roll and land on a dime, but their dimes have already been crossed through on the two dimes and a nickel equivalent card, they can start a second two dimes and a nickel card.

When players have four quarters all crossed through, they are given a $1. 

Each player collects a quarter when they roll a number and pass the last space on the board.

The object is not to be the first to finish, but to finish with the most money.

Count the dollars and coins at the end of the game to determine the winner! 

I earned $2.56 and my son won with $2.94.

Wednesday, August 17, 2016

Paper Bugs Walking on Water (Surface Tension Experiment)


Surface tension experiments are the coolest. This one lives up to the others we've done. We made paper bugs walk on water! Here's how we did it.

What You Need
Card stock
Downloadable pattern - optional (free on Google Drive here)
Basin or pan of water (we used the bathtub)
Scissors

What to Do
Either fold card stock and draw a bug so it's back is at the top of the fold and it has large wide feet or print the downloadable pattern on card stock and fold. Do not crease the fold on the paper tightly; if possible leave it lightly creased only. Cut out your bug. 


Bend the feet back so your bug stands up. 


Gently (this may take some practice for rambunctious kids) place the bug in the water so its feet stand on the surface of the water.


Make several because it may take a few tries; once your bug is submerged, it has to be thrown out!

Why it Works
The surface of the water is like a thin film, formed by surface tension. Lightweight objects can actually balance atop this surface. Once your bug's legs penetrate the surface of the water and it absorbs enough water, it will no longer float. Each bug is for one-time use in this experiment. 

This great activity came from 365 Science Activities, which also served as the inspiration for my bug designs. Check it out!!
 

Monday, August 8, 2016

After School Linky (8-8)

Welcome to the party!


How much of summer is left for you before the kids heads back to school?
Yikes! We only have a few weeks!

Here are just a few activities (from last week's link-up) that I'm adding to our must-do list this school year.

 Bird Watching Journal from Creative Family Fun

 Glacier Activities from Highhill Education


The After School Linky is cohosted by
Relentlessly Fun, Deceptively Educational

We would love to have you link up your School-Age Post (Ages 5 and up) about your learning week after school including Crafts, Activities, Playtime and Adventures that you are doing to enrich your children's lives after their day at school, home school, or on the weekend!

When linking up, please take a moment to comment on at least one post linked up before yours and include a link on your post or site! By linking up, you're giving permission for us to share on our After School Pinterest Board and feature an image on our After School Party in the upcoming weeks.

Friday, August 5, 2016

How Plants Absorb Water (experiment)


I always feel goofy sharing basic activities, but truthfully, sometimes the oldest and simplest things you can do with your kids are great learning opportunities.

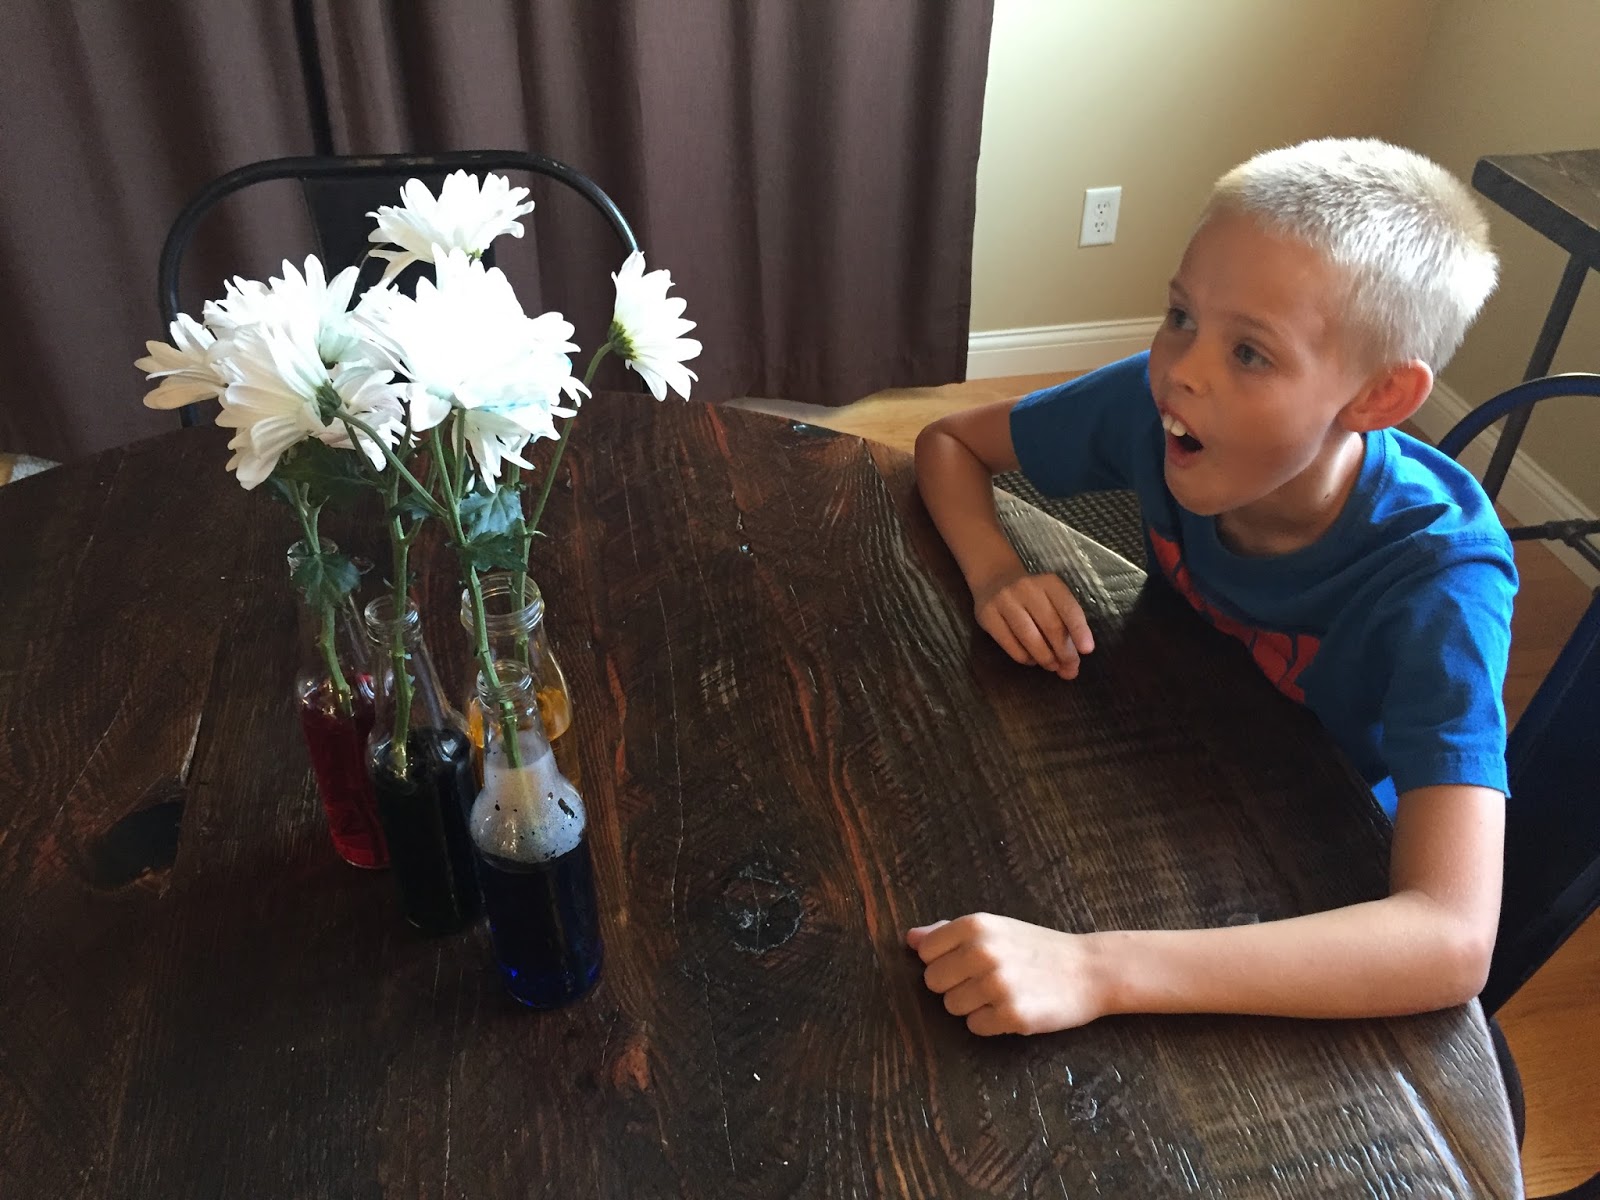
The boys learned about how plants absorb water by dying flowers. Here's how we did it.


What You Need
Food Coloring
Flowers (we used daisies)
Water
Glasses/Vases/Bottles
Scissors

What to Do
Trim your flowers, cutting the stems on an angle under running water. A blunt flat end that sits squarely against the bottom of the vase, will make it difficult for the plant to draw up water.

Add 15-20 drops of food coloring in each vase. Add lukewarm water. 


Place a flower in each and observe over the next few days or week. If desired, keep a journal!


What We Observed
Even our leaves and flower petals were tinged with the dye. The blue dye had the most impact on the appearance of the flowers. Our yellow dye hardly made a noticeable difference. The boys were astounded to see the changes.


The oldest boy hypothesized that the plant would filter out the dye and there would be no noticeable difference. This experiment proved him wrong!


Monday, August 1, 2016

After School Linky (8-1)

Welcome to the party!


We're having a great summer. I hope you are too!

Here are some of the extraordinary ideas/activities shared last week.

O'Clock Ladybug Puzzles from Boy Mama Teacher Mama

Toys for Kids Who Love to Build at The Jenny Evolution


back to school :: resources from The Logbook

The After School Linky is cohosted by
Relentlessly Fun, Deceptively Educational

We would love to have you link up your School-Age Post (Ages 5 and up) about your learning week after school including Crafts, Activities, Playtime and Adventures that you are doing to enrich your children's lives after their day at school, home school, or on the weekend!

When linking up, please take a moment to comment on at least one post linked up before yours and include a link on your post or site! By linking up, you're giving permission for us to share on our After School Pinterest Board and feature an image on our After School Party in the upcoming weeks.

Wednesday, July 27, 2016

Days of the Week {free printable board game}


A few weeks ago when the boys were doing a Bedtime Math problem, my youngest had trouble remembering the order of the days of the week. I wrongly assumed he had them mastered. My bad.

To give him a little practice, I made a simple board game for us to play.


What You Need
Free printable PDF of the game board and playing cards (click here to download from Google Drive)
Heavyweight cardstock (7 pages minimum)
Tiny game pieces, a different one for each player
Paper trimmer (or scissors)

Prep
Download the 2-page PDF from the link above. For a two-player game, you'll need to print about 6 copies of page 1 (the game cards). Print one copy of page 2 (the game board). Use a paper trimmer or scissors to cut out all the game cards.

Play
Place two game pieces on the board's first space (Sunday). The youngest player draws a card. They must identify the missing day of the week and move their game piece to the next occurrence of that day on the board.


If they draw a card "Draw Again" card, they must draw until they get a missing-day card and then move TWO of those days forward (e.g. put their game piece on the second Monday ahead of them). 

The first player to the finish wins!

Read
Our 6-year-old read Terri Sievert's Days of the Week to me to go along with this activity!

Monday, July 25, 2016

After School Linky (7-25)

Welcome to the party!


Where has July gone? It's nearly over! 

There's still time to get inspired and have a fun (and learning-packed) summer!

Here are some of my favorite activities from last week's link-up.

 My Book of Four Seasons: Paper Bag Book from Creative Family Fun

 10s Target Practice from The Afterschool House

 Summer Adventure One in a Minion from A-Z Schoolers

Large Pick-Up Sticks from Nap Time Creations

 Seashell Memory Game for Kids at Growing Up Gabel

 Summer Photo Scavenger Hunt at Grandma Ideas

Parking Garage Number Activity at Teacher Mom Plus 3

The After School Linky is cohosted by
Relentlessly Fun, Deceptively Educational

We would love to have you link up your School-Age Post (Ages 5 and up) about your learning week after school including Crafts, Activities, Playtime and Adventures that you are doing to enrich your children's lives after their day at school, home school, or on the weekend!

When linking up, please take a moment to comment on at least one post linked up before yours and include a link on your post or site! By linking up, you're giving permission for us to share on our After School Pinterest Board and feature an image on our After School Party in the upcoming weeks.