Wednesday, March 11, 2015
Black is black, right? Nope. (A Chromatography Experiment)
Because our color theory activity book was such a hit, I suspected a chromatography experiment would be as well. I was right.
My 9-year-old son and I both found this fascinating.
I can think of loads of other adjectives to use to describe it too ... cheap, simple, fast, impressive ... heck, it was almost magical.
Supplies
Clear Drinking Glass
Pencil
Coffee Filter
Tape
Black Watercolor Marker
Rubbing Alcohol
Prep
1. Flatten and cut the coffee filter into a wide strip that's a little more than an inch across. Trim the ends to make a rectangle.
2. Tape one end around the middle of a pencil. Put the coffee filter pencil into your glass, so the top of the pencil ends rest on the rim of the glass and the filter hangs down into the bottom. Trim the coffee filter so it just touches the bottom of the glass. Remove.
3. Fill the glass with a 1/4-inch (or approximately 1 centimeter) of rubbing alcohol.
4. Draw a dot in the middle of the coffee filter strip about 2 centimeters (or a 1/2-inch) from the bottom. Your dot needs to be higher than the amount of alcohol in your cup.
Experiment
Place the pencil back on top of the cup so the bottom of the coffee filter touches the alcohol in the glass.
Watch what happens as the coffee filter wicks up the moisture. How does it impact the dot?
My son's hypothesis was that the dot would totally disappear. When he saw the dot appearing to move up the paper, he thought he might be on to something.
The more we watched, the more the dot changed. The pigments in the watercolor ink began to separate. First, we saw green, then pink and purple and even some blue too. I reminded my son about how we make black paint from other colors of paint. "Oh yeah!" he exclaimed.
The rubbing alcohol initiated chromatography, which (in layman's terms) is the process of a liquid or gas changing a mixture into its components, in this case through absorption.
By the end of the night, our black ink had moved all the way up the coffee filter strip. What a cool experiment!
This wonderful activity came from Science Experiments for Kids.
Monday, March 9, 2015
After School Linky (3-9)
Welcome to the party!

This linky never disappoints. The great ideas and activities just keep coming.
Here are some of my favorites from last week's party.
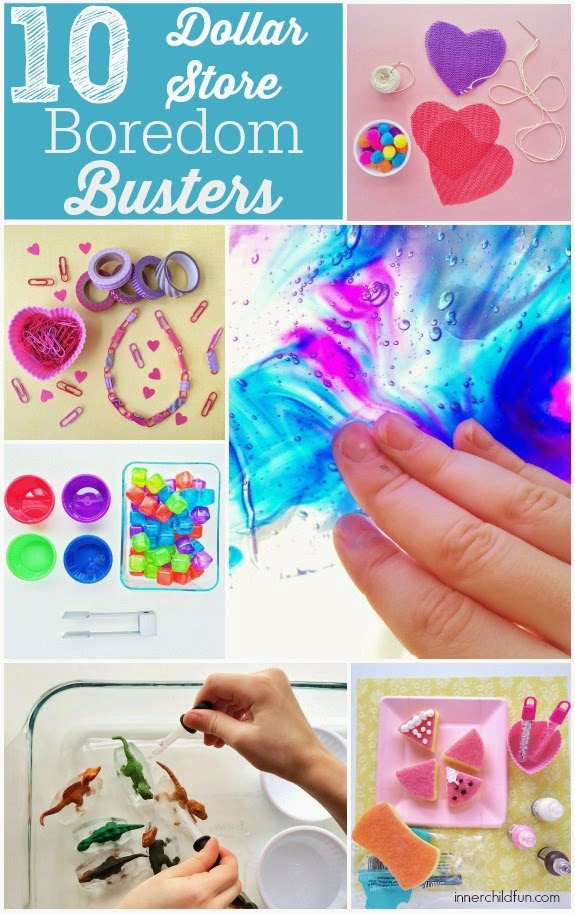
Dollar
Store Boredom Busters at Inner Child Fun
Homework:
Tip of the Week - Mother, May I at Planning Playtime
Kindergarten
Worksheets - Gold Coin Number Mats at JDaniel4's Mom
Make
a Real Rainbow: St. Patrick's Day Science Experiment at Christianity Cove
Middle
School Hands-On Science: Extreme Winds + Free Minibook at Tina's Dynamic
Homeschool Plus
STEM
Fun for Kids: Code Your Name in Jewelry at Mama Smiles
Zentangles
at Art Curator for Kids
75
FREE Printable Scavenger Hunts at My Joy-Filled Life
We would love to have you link up your School-Age Post (Ages 5 and up) about your learning week after school including Crafts, Activities, Playtime and Adventures that you are doing to enrich your children's lives after their day at school, home school, or on the weekend!
When linking up, please take a moment to comment on at least one post linked up before yours and grab our after school button to include a link on your post or site! By linking up, you're giving permission for us to share on our After School Pinterest Board and feature an image on our After School Party in the upcoming weeks!
Friday, March 6, 2015
Magical Linking Chain (the Science of Force)
It doesn't take much persuasion to get kids interested in an after school activity when you preface it by asking, "Wanna learn a magic trick?"
The truth is, this isn't really magic at all. It's science ... but I'll get to that more later.
What You Need
A paper bill
2 thin rubberbands
2 metal paperclips
Prep
Put a rubberband around each end of the bill. Now fold the bill in even thirds, making a z-fold but don't crease the folds. One rubberband should be positioned where the bill doubles-back on itself (i.e. the uncreased folds). Now add paperclips (use the photo as a guide for where to position them).
What to Do
Have your child pull each end of the bill apart, as if to flatten it. Then gently remove the rubberbands to see that they have formed a chain with the two paperclips linked between them.
Magic?
Nope. The force of pulling the bill and the position of the rubberbands and paper clips causes them to intertwine. Do it slowly and you see it happening!
Like our ball that seemed to defy gravity, this activity also came from Martin Gardner's phenomenal book Smart Science Tricks. It's a gold mine of simple, inexpensive experiments for kids. We've had a blast with it!
/
Wednesday, March 4, 2015
Shamrock Count & Write Treasure Hunt
As it turns out, treasure hunts are a favorite of BOTH my
sons. Our youngest (5 years old) is working on counting, recognizing and
associating numerals, and writing numbers. All of those skills are combined in
this easy treasure hunt.
You decide the prize - ours was 10 extra minutes of
electronic time (our boys have to earn their time each day so this was a REAL
treat).
What You Need
The 6-page PDF of shamrock cards (download mine here)
Cardstock
Tape
Prep
Cut the cards apart and fold them on the dotted line so one side has the shamrocks and the other shows the ready-to-write numerals. Secure shut with glue or tape. The
numeral 5 is the starting card. You'll notice that it is the only card that
need not be folded. (Note: The cards do not go in numerical order.)
Take all the folded cards and tape them up around the
room with the shamrocks facing out.
Play
To start the game, give your child the numeral 5 card and
ask that they use the prompts to write it. Start at the suns. End with the
moons.
"What number is that?"
"Five."
"Good. Now find the card with FIVE shamrocks."
When they've counted and confirmed they've found the
card, have them turn over the card and write the numeral on the back. They'll
then search for the card with that number of shamrocks. Play continues until
they find the 8-shamrock card to finish.
Note: The six and nine numerals can be easily confused in
this game. Remind kids that the red line is the top and the solid blue line is
the bottom.
This game was loads of fun! If you want to play over and
over, simply cut the cards apart so you can mix and match the front and backs.
Laminate and use dry-erase markers so they can be reused again.
Happy numbers hunting!
Monday, March 2, 2015
After School Linky (3-2)
Welcome to the party!

There is so many fun holidays and celebrations coming up. It's great to see how all the linky participants have been combining fun and learning around Dr. Suess' birthday, St. Patrick's Day, Chinese New Year, Black History Month, etc.
Here are just a few of the great activities and ideas shared last year.
Rainbow
Paper at The Science Kiddo
Dr. Suess Word
Family Hats at This Reading Mama
St.
Patrick Day Math Challenge (with a Free Printable) at Planet Smarty Pants
How
to Add with Regrouping Tips & Tricks at Sugar Aunts
Jack
Be Nimble Activity & Free Pack at 3 Dinosaurs
Creative
Group Activity for Kids: Making Monsters at Mama Smiles
Math
Fact Islands at Creative Family Fun
Simple
Science Experiment: How Much Water is in Snow? at KC Edventures
The After School Linky is cohosted by
Relentlessly Fun, Deceptively Educational
We would love to have you link up your School-Age Post (Ages 5 and up) about your learning week after school including Crafts, Activities, Playtime and Adventures that you are doing to enrich your children's lives after their day at school, home school, or on the weekend!
When linking up, please take a moment to comment on at least one post linked up before yours and grab our after school button to include a link on your post or site! By linking up, you're giving permission for us to share on our After School Pinterest Board and feature an image on our After School Party in the upcoming weeks!
Subscribe to:
Posts (Atom)