Monday, September 12, 2011

Measuring with Paper Clips

WHOA! I just looked back in my archives and realized that my son hasn't practiced measuring since July. Shame on me! And after heeding the reading summer camp teacher's advice and making the nuts and bolts game, I wanted another fun way to exercise my son's fine motor skills too. This activity combines both fine motor and measuring.


All you need are paper clips ... lots and lots of paper clips of the same size. Did I mention you need paper clips? I think you get the point.


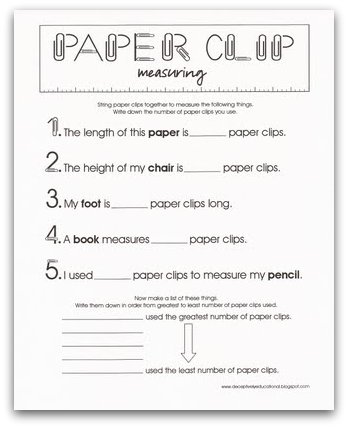
I gave my son a worksheet I'd cooked up to get him started. While I don't want to overwhelm my son with worksheets, I do like that they sneak in extra reading practice and help me gauge how well he does following directions. (Download the worksheet I made here.)

The purpose of this activity is simple - to string paper clips to measure various items, such as:
the worksheet,

the chair he was sitting in,

and his pencil.

After measuring these (plus his foot and a book) he needed to review the number of paper clips each required and put them in order from greatest to least.


Stringing paper clips was a bit of a struggle for my son at first but, with some serious concentration and a whole heap of determination, he caught on.


We'll be doing this activity again, I'm sure!

Friday, September 9, 2011

How to Make a Thunderstorm

When a follower e-mailed and told me that her son was fearful during thunderstorms, I was inspired to help. Most of my fears as a child stemmed from the unknown. And with all the mystery surrounding the weather, it’s no wonder so many kids are scared. These activities, as well as the others featured this week on clouds and the water cycle, are meant to demystify the weather. The following are three ways my son and I tried to replicate what goes on in a thunderstorm.

LIGHTNING
Our experiment started with a clay monster. A house made out of modeling clay would probably have made more sense. (But that’s what I get for giving a 6-year-old choices.) We attached several 'lightning rods' (paper clips or safety pins) as hair. Then, I blew up a balloon, grabbed a wool coat, and we headed into a windowless room.


After vigorously rubbing the balloon against the wool (roughly 30 seconds), I held the balloon near the monster’s hair and, after several tries, we not only heard the crackle of our lightning, but saw it jump from the balloon to the metal. It was SO cool!!

I found the directions for homemade lightning on the Disney Family Fun site. TIP: Don’t blow the balloon up too full; a smaller balloon is easier to hold.


THUNDER
While I typically like to make popcorn the way my grandparents did on the stovetop crankin’ a handle until the pops have stopped, a microwave is a quicker way to ‘make thunder.’ Before I nuked a bag of unpopped popcorn, I explained to my son what happens during a storm. The following is an excerpt from Darice Bailer’s book Why Does it Thunder and Lightning? It seemed like a perfectly simple explanation for thunder:

The electric current that flows through the sky heats the air so fast that the air explodes. The explosion causes a rumbling or a loud BOOM in the sky.

I told my son that the microwave was going to make an electric current, similar to the one flowing through the sky during a storm. Then we listened for the noise created when the air inside the microwave was heated up quickly.


It wasn’t long before we heard our ‘thunder’ (the popcorn popping). What a yummy lesson!


RAIN
Making rain inside of a jar was a simple extension of the condensation experiment we did during our water cycle lesson. I first read about this experiment on I Can Teach My Child, one of my favorite blogs. It's pretty simple. 

Heat water until it's almost boiling. Pour some of the water into a clear glass jar. Put a plate on top of the jar and add ice cubes to the plate. Wait a few minutes and then watch inside as the condensation builds and streaks of water pour down the sides of the jar. It’s raining in there!

Wednesday, September 7, 2011

Cloud Identification Mobile

Since my son learned about clouds during our water cycle activity, I figured a more in-depth exploration of those fluffy beautiful (and sometimes ominous) sky shapes was in order.

Unfortunately, the day we did this activity there was ZERO clouds in the sky outside.
Bummer, eh? The good news, though, is that my son’s new Cloud Identification Mobile will help him ID them tomorrow.


Before we began this craft, we read a great book about clouds. It’s another Rena Korb masterpiece (we read Wild about the Water Cycle for our previous weather activity). This Science Rocks series is a perfect introduction to scientific investigation and comes with simple explanations and fun cartoon-like graphics that remind me of the PBS show “Word Girl.”


After reading, my son had a basic understanding of four types of clouds: Stratus, Cirrus, Cumulus, and Cumulonimbus. I gave my son four oval shapes that had a hole punched in them and asked him to draw each cloud type. Once he’d put his cloud shapes on the front, I wrote the name on the back along with a few of the facts noted in Korb’s book.


Then I cut strips of yarn and we worked together to tie them to each. We referred to Web Weather for Kids’ site, where a cloud diagram showed us where each cloud typically resides in the troposphere. My son positioned the cloud drawings accordingly (for example, we made the stratus clouds hang the lowest, since they are typically a low-lying cloud). I tied on a “clouds” label inside the hanger (I traced the hanger's shape on the paper before I cut it out).

How do I know my son loved this? When his father came home, the first words out of his mouth were, “Did you know there are different kinds of clouds, Dad?” Off to his room they went to look at the mobile. 

Monday, September 5, 2011

Water Cycle Puzzle

What are clouds? Why does it rain? Where do the puddles go? To make understanding the water cycle easier, I designed a puzzle for my son to complete.


First, though, we learned a little from some amazing books.


Evaporation and condensation are tough to explain to a 6 year old. To help him “see” evaporation, we filled a transparent glass half full of water and I cut a strip from the sticky part of a post-it note to mark where the water line was. We’ll be observing it all week to see how much water evaporates.
UPDATE: After one week, 1 1/2 centimeters of water had evaporated from our glass.
To illustrate condensation, I filled a glass mason jar two-thirds full with warm water and screwed the lid on. It didn’t take long before the jar’s sides above the water line steamed over and beads of condensation formed.


Afterwards, I gave my son the puzzle and asked him to put the pieces and arrows in the right order. When my son wasn’t sure, I told him to turn the pictures over and read the back. 
Before long, he had all the pieces in place. We turned the oval pictures over to double check. He was SO excited to get it right!

To make your own Water Cycle Puzzle, you need:
1 large, empty cereal box
2 pieces of sticker paper
Water Cycle Puzzle template (download a 2-page PDF here)
An exacto knife
Glue

Directions:
Cut the cereal box and save the two largest rectangles; recycle the rest. Print both pages of the Water Cycle Puzzle PDF onto sticker paper. Peel off the backing from the first page (the one with the large pictures). Adhere this (centering it) to the plain brown side of one of the cereal box rectangles. Cut off any excess. Carefully use an exacto knife to cut out the ovals and circles (put a cutting board or cardboard underneath to protect your work surface).

Use scissors to cut out the ovals and circles on the second Water Cycle Puzzle page. Peel off the backing and adhere these stickers to the back of the shapes you just cut out. Glue the cardboard Water Cycle page with holes to the other cereal box rectangle (brown side up). Let dry. 

Then, get ready for some puzzle fun.

Friday, September 2, 2011

Count and Stamp with LEGOs

My son’s favorite toy is LEGOs. (Who am I kidding? They’re probably my favorite toy too.) They are great fine motor practice, encourage creativity and role play, don’t require batteries, and don’t make noise. To work on counting with my son, I created this LEGO math activity.

What you need:
LEGO stamping answer sheet and number cards
Washable ink stamp pad
LEGO blocks (no flat ones or one-dot blocks)
A few plies of paper towel or a piece of craft foam
Plastic hollow popsicle stick (mine came in Wilton’s Lollipop Wrapping Kit)

Download the answer sheet and printable number cards from Google Docs here.
What he did:
My son drew a card and wrote the numeral on his answer sheet. Then he dug through the bowl of LEGOs to find blocks which had dots that added up to the number on his card. Insert the popsicle stick into the back of the block (it won’t fit inside the circles, but rather between the side of the block and the center circles). 

Press into the ink and stamp in the box on the answer sheet next to the printed numeral. Note: place paper towels or foam sheet under the paper so the imprints are more visible.


Voila, math with LEGOs!


PS – Like the LEGO number cards I made? Make your own LEGO numbers using instructions from the LEGO website. My son LOVED doing this!