Wednesday, June 29, 2016

Spray-Painted Patriotic Tees


Since our July 4th decorative tee shirts haven't been an annual craftivity, I can't quite call them a tradition. But given that this is our third installment, it's certainly something that's makes our Independence Day holiday all the more festive.


Check out our painted handprint flag shirt and July 4th tie-dye shirts from the past!

This year's shirt craft uses handmade freezer paper stencils and TULIP Color Shot Instant Fabric Color. We used red, white, and blue on grey tee-shirts. If I was to do it all again (and believe me, we will), I'd skip the white as it's barely visible and made our designs look washed out. Red and blue will suffice.


Here's how we made them.

Step 1 Pre-wash your tee-shirts if you're using new ones. Don't use fabric softener.

Step 2 Decide on your design. Silhouettes look awesome. Download something from the Internet or if you're artsy, draw something. If you like the ones we created, you can download a PDF of my designs from Google Drive here.

Step 3 Either cut your freezer paper to 8 1/2 x 11 and feed it through your printer or print the designs on regular paper and trace the design onto the freezer paper (hold both pages up to a window to create a light box effect). The design should be on the matte (NOT shiny) side of the freezer paper. Think about using upper case letters to lessen the number of tiny pieces of paper you'll have to iron back on once the design is cut out (e.g. the space inside the 'e').

Step 4 Using a craft knife (think pen-like exacto blade), carefully cut out the pattern with a cutting board underneath your freezer paper. Save the internal pieces you'll need to iron back on. NOTE: Be smart about who does the cutting. If you wouldn't hand your child a steak knife or let them cut an apple, they have poor fine motor skills, or can't be responsible with this tool, do the cutting yourself. For several of these reasons, I did all the cutting.

Step 5 Set your iron to medium-low heat (mine was on a setting of 3 out of 6). Place the design on your tee shirt in the desired place, with the shiny part of the freezer paper face down. Press the paper until it's attached in every place. NOTE: Irons are hot. Don't let your child use the iron if they're not capable of using it safely. Always provide supervision.


Step 6 Insert more freezer paper, a flattened garbage bag, cereal box, or cardboard shirt form inside the shirt. This is a MUST to avoid the paint bleeding through to the back of the shirt.

Step 7 Mask off the rest of the shirt. Overspray is a problem with this paint, which is basically spray paint for fabric. Any exposed areas of the shirt will inadvertently get painted. I used painters tape and plastic grocery sacks to mask off all exposed areas, even tucking the rest of the shirt under the cardboard form.


Step 8 Take the shirt to a well-ventilated area where you're not concerned with overspray ruining furniture, etc. We went outside and put our shirts in the grass. Shake each can of the paint for a minute. Then apply holding the can 6-8 inches above the shirt, slowly moving it across the stencil.


Step 9 Apply multiple light coats going back and forth. TIP: Kids tend to be heavy on the trigger and spray in one spot. Encourage your child to be gentle and move the paint can around the design. If too much paint is squirted in one spot, it WILL bleed beneath the freezer paper stencil.

Step 10 Wait until it dries, and remove all the stencil, painters tape, bags, and cardboard. Enjoy!


Want some great books to read to go along with this craft? Here's what I read to my six-year-old:

Monday, June 27, 2016

After School Linky (6-27)

Let's party!


Can you believe that June is almost over?!? Where has the time gone?
Get all the summer fun in that you can before it's too late.

Here are a few of the amazing ideas shared last week.


 Crete Paper Jellyfish from Little Miss Honeybee


 Party on a String at Grandma Ideas

 Splatter Paint Fun from Nap Time Creations

Camp Jenny: Summer Camp at Home from The Jenny Evolution

The After School Linky is cohosted by
Relentlessly Fun, Deceptively Educational

We would love to have you link up your School-Age Post (Ages 5 and up) about your learning week after school including Crafts, Activities, Playtime and Adventures that you are doing to enrich your children's lives after their day at school, home school, or on the weekend!

When linking up, please take a moment to comment on at least one post linked up before yours and include a link on your post or site! By linking up, you're giving permission for us to share on our After School Pinterest Board and feature an image on our After School Party in the upcoming weeks.


Friday, June 24, 2016

DIY Play Aquarium


On our vacation, we visited the Monterey Bay Aquarium in Monterey, CA. Our little guy has talked about it several times since we've been home. It made quite the impression. To capitalize on his interest of all things fishy, I thought we'd make our own aquarium.


This genius idea came from Made By Joel. His example is artistic and modern - a real must see, so stop over there.

What We Used
A corrugated cardboard box
Craft knife
Scissors
Ruler
Pencil
Watercolor paper
Paints, markers, colored pencils, blending art tissue paper, etc.
Mono filament (aka clear fishing line)
Buttons
Glue
Tape

How We Made It
Using the ruler as a straight edge, on one side of the box I drew and then cut with a craft knife some slim channels, approximately an inch apart. I made sure the channels I cut were narrower than the width of my buttons.


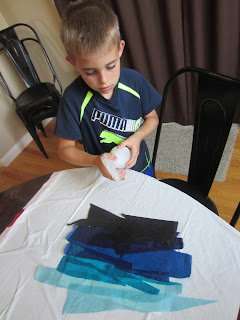
Now my son got to decorating the background of our aquarium. I gave him a piece of watercolor paper and we layered strips of bleeding art tissue paper (lightest at the top and darkest at the bottom).


Once spritzed with water, the colors began to bleed onto the paper. My son, however, wanted to press paper towels into the top of the tissue to wipe up the excess water. The stipling of the paper towels made for some beautiful texture and we decided we liked the look so our paper towel (once dried) became the background of our aquarium. I love a happy accident!


Now I cut fish shapes out of the thick watercolor paper and my son and I colored them.


I taped the end of mono filament to each fish, strung them through the slits in the box and then wound them through the holes of a button before knotting each. This enabled my son to move the fish back and forth to make our aquarium fish (and jellyfish) more active.


Read
To go with this activity, we read a wonderful book. It reminded us of our visit to the aquarium and all the phenomenal creatures we saw there. 

Wednesday, June 22, 2016

Star-Spangled Sun Catchers


With the July 4th holiday rapidly approaching, I thought it might be fun to craft our way to a more festive window display.


Our youngest son loves art and building. When I saw these stunning stars on The Eric Carle Museum of Picture Book Art website, I knew we had to give it a try.

What You Need
Slim wooden craft sticks
Low-temp glue gun and low-temp glue (optional)
White school glue
Paintbrush (optional)
Tissue paper in assorted colors (we used red, white, and blue)
Scissors
Mono filament (aka fishing line) for hanging

How to Make Them
Arrange five sticks in a star formation, adding dots of glue at the points to connect. I applied the dots of glue with a low-temp glue gun and my son arranged the sticks. You can do this with white glue, but will need to allow for drying time before step two. Don't worry if your stars aren't perfect. The lopsided look adds to their whimsy!


When the sticks have been made into stars, apply white school glue to the sticks. Since I thought squeezing out a small amount might be asking too much from my six-year-old, I squirted it in a disposable cup and we brushed it on with paintbrushes.


Once covered in glue, we laid a piece of tissue paper over the star and pressed lightly to make sure it made contact with all the gluey sticks.


Once dried, I carefully cut around the edges of each star, poked a hole in the tissue and threaded mono filament through. I then hung the sun catchers in our window to enjoy.


My son got creative and made one GIANT star. Encourage your kids to play around with various shapes and layers of the colored tissue. A little glitter might create an extra fun spotted look too!

Monday, June 20, 2016

After School Linky (6-20)


Let's party!


I hope you all are having a great summer. Here are a few of the outstanding blogs shared last week.


Dinosaur Unit 3 with Free Printables from Every Star is Different

Children's Books Featuring Frogs from The Jenny Evolution


The After School Linky is cohosted by
Relentlessly Fun, Deceptively Educational

We would love to have you link up your School-Age Post (Ages 5 and up) about your learning week after school including Crafts, Activities, Playtime and Adventures that you are doing to enrich your children's lives after their day at school, home school, or on the weekend!


When linking up, please take a moment to comment on at least one post linked up before yours and include a link on your post or site! By linking up, you're giving permission for us to share on our After School Pinterest Board and feature an image on our After School Party in the upcoming weeks.


Friday, June 17, 2016

Sight Word Search & Graph


Our youngest son (age 6) did a lot of word work this week. I'm trying my best to ward off the dreaded summer slump. That summer between kindergarten and first grade is critical. Those phonics and sight words are building blocks beginning readers need to hit the ground running when school resumes in the fall.


I thought my son might protest when I handed him a book; our reading typically happens before bed. When I gave him a half sheet of large-type graph paper, he was intrigued.

Prep
Download my free PDF of the Sight Word Search & Graph paper (or make your own).


Print the graph.
Pick a book for beginning readers, and review the vocabulary in the book. I used a Level 1 Penguin Young Reader by Bonnie Bader.


Select four recurring words and write them at the bottom of the graph. I used come, me, play, and will.

Read & Graph
Have your child read the book and look for the words noted on your graph. Each time one of the words occurs, have them color a block. For competitive kids, make it a sight word competition; which word will win?


This is a simple activity that combines early math skills with reading. My son really enjoyed it!

Wednesday, June 15, 2016

Gumball Sight Word Sort


Our six-year-old's reading skills are really coming along. But he nervously exclaimed, "Mom, I'm forgetting my sight words!" a few days ago. To keep those 100+ words he learned in kindergarten locked in his brain for good, and to especially work on those that trip him up, I cooked up a simple activity.


This word work takes hardly any time to prepare and can be used with any words your child needs to work on. For that matter, you could use the same concept to practice math facts even.

What You Need
The 1-page PDF of gumball machines
Office paper
Dot pricing stickers
Pen or marker


Download the gumball machine PDF free from Google Drive here. Print on plain 'ol office paper.

At the bottom of each machine, write one sight word. I chose four that my son sometimes confuses: them, there, here, and the. I wrote these same words in random order on the dot stickers.

When I gave him the activity, we first read the words on the machines. Then I asked him to place the stickers (aka gumballs) on the right machine, saying them as he sorted.


This simple activity works relies on repetition to reinforce learning. It's simple and whimsical. And I think my son would say fun, too.

Enjoy!


Monday, June 13, 2016

After School Linky (6-13)

Let's party!


Sorry for my hiatus, followers. We're back from vacation and ready for summer sun and lots of fun!

Here are a few of the outstanding ideas/activities shared last week.

Camping I Spy Game Printable from Growing Up Gabel


 Sight Word Islands at Creative Family Fun


 200 FREE Summer Activities for Kids from The Jenny Evolution


The After School Linky is cohosted by
Relentlessly Fun, Deceptively Educational

We would love to have you link up your School-Age Post (Ages 5 and up) about your learning week after school including Crafts, Activities, Playtime and Adventures that you are doing to enrich your children's lives after their day at school, home school, or on the weekend!


When linking up, please take a moment to comment on at least one post linked up before yours and include a link on your post or site! By linking up, you're giving permission for us to share on our After School Pinterest Board and feature an image on our After School Party in the upcoming weeks.

Monday, June 6, 2016

After School Linky (6-6)

Let's party!


Sorry, followers, that there aren't any ideas from last week's link up. I'm busy vacationing with my family!

The After School Linky is cohosted by
Relentlessly Fun, Deceptively Educational
We would love to have you link up your School-Age Post (Ages 5 and up) about your learning week after school including Crafts, Activities, Playtime and Adventures that you are doing to enrich your children's lives after their day at school, home school, or on the weekend!

When linking up, please take a moment to comment on at least one post linked up before yours and include a link on your post or site! By linking up, you're giving permission for us to share on our After School Pinterest Board and feature an image on our After School Party in the upcoming weeks.