Monday, July 8, 2013

After School Linky Party (7/8)


Welcome to the After School Linky!


Every week I try to narrow down my favorites from the previous week's party.
"I'll pick five or less," I think.
And every week I. cannot. do. it. (sigh)
So, yet again, here are six of the phenomenal activities shared last week.


Viscosity Races - Large Scale by Science Sparks.
(Kids test the speed liquids flow with a stop watch. Fun + educational = awesome!)


Totem Poles by ArtClubBlog.
(Would you believe it? That is none other than paint, paper mache and a cardboard cylinder [think Pringles can]. Stunning!)


Creating Tessellation Mathmatical Artwork by Highhill Education.
(I have ALWAYS been fascinated by tessellations. Thanks to jmommymom's tutorial, I can make them with my son now!)


Word Family Houses for short i by The Measured Mom.
(If you have/know an emergent reader, immediately click this link. These free printables are simple, fun, and oh-so-very useful!)


Science for Kids: Make a Penny Turn Green (with free printable) by Buggy and Buddy.
(With materials you have on hand, kids will be amazed at this chemical reaction.)


Summer Word Jar (Plus Tips and Ideas) by What Do We Do All Day?.
(Expand kids' vocabulary in a fun and engaging way - with a word jar! This is SO clever.)


Relentlessly Fun, Deceptively Educational

We would love to have you link up your School-Age Post (ages 5 and up) about your learning week after school including Crafts, Activities, Playtime and Adventures that you are doing to enrich your children's lives after their day at school, homeschool or on the weekend! When linking up, please take a moment to comment on at least one post linked up before yours and grab our after school button to include a link on your post or site! By linking up you're giving permission for us to share on our After School Pinterest Board or Feature on our After School Party next week! Don't forget to follow along and join our After School Enrichment Community.


Wednesday, July 3, 2013

July 4th Painted Flag Shirt


Happy Independence Day! Our boys will be sporting these adorable hand painted t-shirts. I saw these online and knew instantly that this was a craft for us.

Forgive me for not giving credit to the blogger who shared these. Unfortunately, I can't find the original inspiration (how could I not have pinned that?!?). Because of this, we painted these shirts with no instruction.

Here's how we did it.

Tear off a large piece of freezer paper from the roll. Insert it shiny side up inside the shirt. With an iron on medium heat, iron the front of the shirt. The heat will make the paper temporary attach to the shirt. This step will prevent the paint you're adding to the front of the shirt from bleeding through.

Now on another piece of freezer paper, draw and cut out long rectangles that when painted will become the red stripes on your flag. Remember to leave a blank space for a handprint.

Position the freezer paper stencil on the front of the shirt. Iron it in place, shiny side down.


Now use red fabric paint and a sponge brush to apply the paint to the stripes. Any paint that is applied on the freezer paper will not bleed through.

When the stripes are painted, carefully peel the freezer paper off the top of the shirt.


Now apply a thick coat of blue paint to one of your child's hands and stamp it in the upper left corner where there are no stripes.


Let dry. Then peel off the paper from the inside of the shirt and put it on!

Monday, July 1, 2013

After School Linky Party (7/1)


Welcome to the After School Linky!


Wow. Judging from all the great activities linked up last week, I can tell your kids are having an amazing summer - packed with fun and learning! Here are six of my favorites from last week's linky.


Ocean Guessing Game from StrongStart.
(This game has loads of appeal for kids of all ages. Show them animals, then have them close their eyes, remove some and ask them to look again. What's missing? Great attention-to-detail skill building!)


FIAR: When I Was Young in the Mountains at School Time Snippets.
(Nature loving kiddos will love making a snake egg!)


How to Make a Montessori Alphabet Box by Wildflower Ramblings.
(This takes literacy learning to a whole new level, encouraging budding readers to associate beginning sounds with letters. SUPER helpful!)


Card Games that Teach Math at Brainstorming the Castle.
(Take some of the most beloved card games and put an educational spin on them. Kids will LOVE this and parents/teachers/caregivers will breathe a sigh of relief that math practice just got A LOT more fun!)


Number Line Fun at Childhood Beckons.
(Joyce has got loads of ideas for using a sidewalk chalk kid-sized number line to make summer learning fun. Put on your sunscreen and head out to the blacktop for some math!)


Fun Jar Friday #50: Working Telescope at Craft, Interrupted.
(Are you thinking what I'm thinking? Yes, apparently you CAN make a telescope. Crafty kids, science-obsessed boys and girls ... you name it, they're going to think this amazing! I know I do!)


Relentlessly Fun, Deceptively Educational

We would love to have you link up your School-Age Post (ages 5 and up) about your learning week after school including Crafts, Activities, Playtime and Adventures that you are doing to enrich your children's lives after their day at school, homeschool or on the weekend! When linking up, please take a moment to comment on at least one post linked up before yours and grab our after school button to include a link on your post or site! By linking up you're giving permission for us to share on our After School Pinterest Board or Feature on our After School Party next week! Don't forget to follow along and join our After School Enrichment Community.

Friday, June 28, 2013

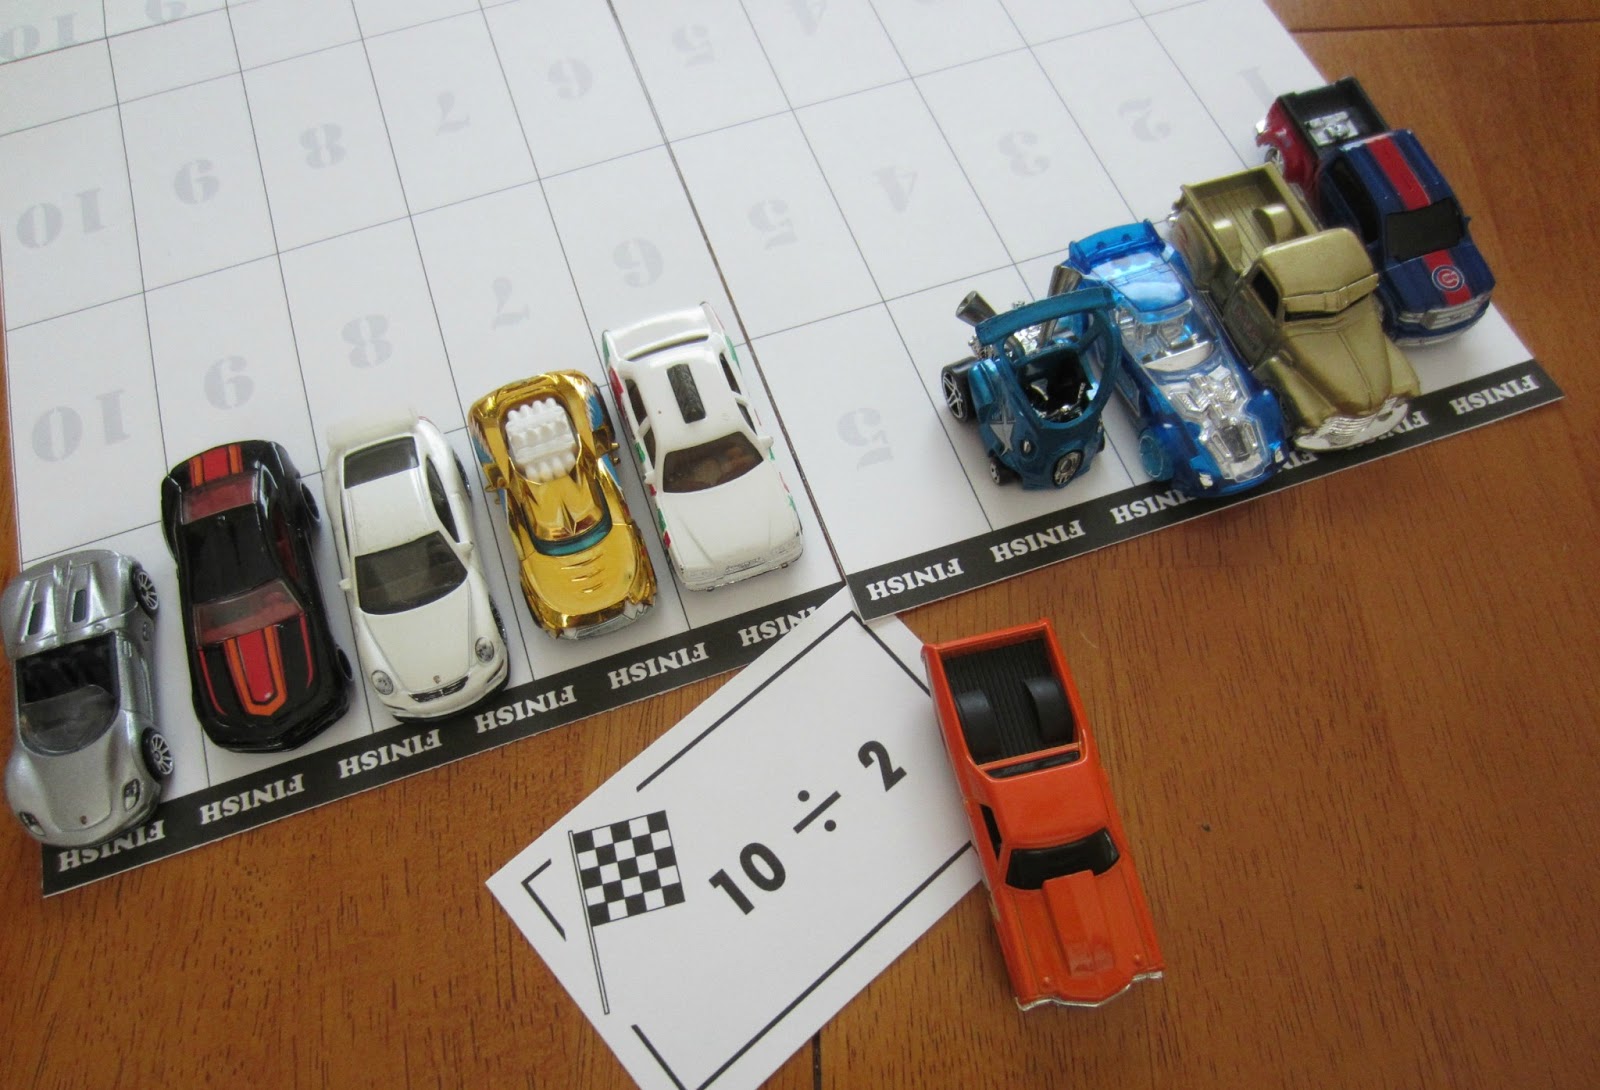
Division 1 Racing [Printable Math Game]


Our youngest son is really into those little metal Hot Wheels and Matchbox cars lately. It seems they're everywhere I turn in our house right now. It's not a wonder when I saw our two sons making a pretend race with them, that the wheels in my brain started turning. How could I make this imaginative play educational too?

This Division 1 Racing game is the result.

What You Need
10 small toy cars
Division 1 Racing track (Download it here; cut and tape together.)
Division 1 Racing playing cards (Download it here; this 13-page PDF has 100 division problems. Print and cut the cards apart.)
Division tables (for when kids get stumped; we used the one here)


How to Play
For multiple players, decide who's racing what cars in which lanes. When my son and I played, he chose the odd-numbered lanes and I raced the cars in the even lanes.


We took turns drawing a card, answering the problem and moving the car that was in the same numbered lane as the answer. For example, if I drew the card 24 divided by 8, I moved the car in lane 3 up one space. It didn't matter that my cars were in the even lanes; we moved each other's cars. 


The object was to answer the problems correctly and watch to see which car would cross the finish line first.


My son shocked me. This game held his interest for a lot longer than I'd imagined; I think we played for nearly 40 minutes! We answered nearly all of the problems before the car in lane 5 won the race. What fun!


This game could easily be played with multiple players - as many as 10 or more if they were solving problems as teams. If your child is playing alone, consider making the track shorter to keep them from getting fatigued and frustrated before the race is won.

By the way, our preschooler has gotten a dose of some educational play with his cars too, namely sorting by color and counting. I'd say we've gotten our money's worth out of these toys!

Wednesday, June 26, 2013

Balloon-Powered Pinwheel


Have you seen this phenomenal idea on Pinterest? It's from the NASA Teacher's Resource Center. In case that didn't convince you that it was awesome, allow me to try.

My oldest son was in a funk and promptly informed me that he did not want to do an activity when he got home from summer camp. But that was before I pulled out the supplies and set them in front of him:

Pencil with a good eraser
Sewing push pin
Drinking straw (the kind with a bendable end)
Balloon
Tape

Curiosity won out and his bad case of the grumps vanished.

First he blew up the balloon to stretch it out. Then he put the straw (the end opposite the bend) into the neck of the deflated balloon. We used scotch tape to secure it in place.


Now he held out his finger to figure out where the balance point was with the balloon-ended straw on it. This was the place where the sewing pin was inserted.


We pushed it down through both sides of the straw and into the pencil's eraser. Then we spun it around a few times to loosen up the hole a bit.


My son was still stumped. I told him to put the bent end of the straw into his mouth and blow up the balloon. Then release it and watch what happens.


Around and around the straw spun on its axis. And again and again, he blew up the balloon to watch it. He was fascinated!


This isn't the first time we've used balloons to propel something. (Check out our squid!)